How to set up SSO with INFOR Portal V1 (LN and older M3 Interface)
Login Details to Cloud
Credentials are mandatory for accessing the Infor Cloud environment. The user should have the roles "Infor-SystemAdministrator" and "UserAdmin".
Config Admin Details (DocBits)
You should have received an email from FellowPro AG with the login details for the DocBits SSO Settings page. You will need a login and password.
Certificate
You can download the certificate in DocBits under SSO Service Provider Settings
URL starts with https://mingle-portal.eu1.inforcloudsuite.com/<TENANT_NAME> followed by your personal extension
Choose the option Cloud Identities and use your login details
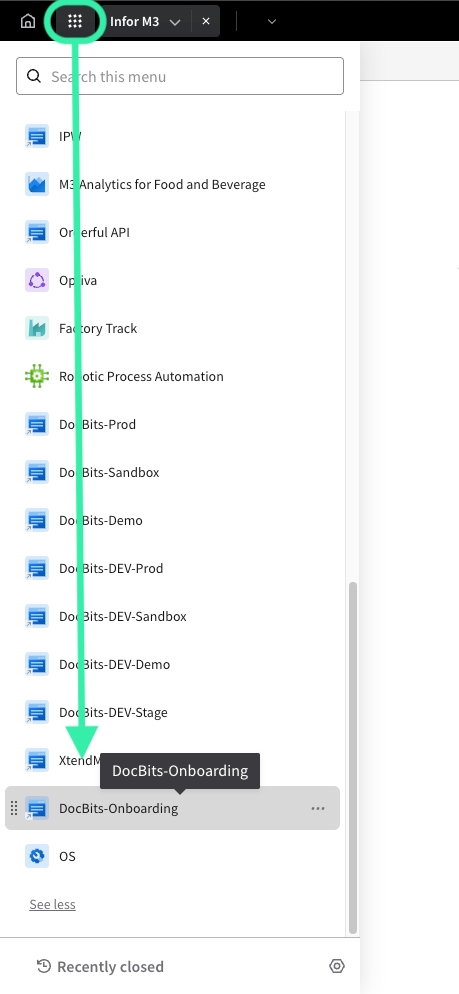
After login you will have access to the Infor Cloud. In this case we enter this page, but on the burger menu you will find access to all applications.
On the right hand side of the bar menu, you will find the user menu and there you can access the user management
Then you need to select in the left hand side menu the option Security Administration and Service Provider.
You will see this window with the Service Providers.
Now click on the “+” sign and add our DocBits as Service Provider.
Log in on URL https://app.docbits.com/ with the login details you received from us.
Go to SETTINGS (on top bar) and select INTEGRATION, under SSO Service Provider Settings you will find all the information you need for the following steps.
Download the certificate
Filling the Service Provider with the help of SSO Service Provider Settings in DocBits
Application Type
DEFAULT_SAML
Display Name
DocBits
Entity ID
See Entity ID under SSO SERVICE SETTINGS
SSO Endpoint
Copy the SSO URL from SSO SERVICE SETTINGS and paste it in the SSO Endpoint field.
SLO Endpoint
Copy the SLO URL from SSO SERVICE SETTINGS and paste it in the SSO Endpoint field.
Signing Certificate
Upload the appropriate .cer file you have downloaded in step 3c) from SSO SERVICE SETTINGS
Name ID Format and Mapping
email address
When you have filled out everything remember to save it with the disk icon above Application Type
Enter the service provider DocBits again.
Click on view the Identity Provider Information underneath.
File looks like this: ServiceProviderSAMLMetadata_10_20_2021.xml
Import the SAML METADATA in the SSO Settings.
Go to IDENTITY SERVICE PROVIDER SETTINGS, which is located under INTEGRATIONS in SETTINGS. Enter your Tenant ID (e.g. FELLOWPRO_DEV) and underneath that line you see the Upload file and the IMPORT Button, where you need to upload the previously exported SAML METADATA file.
Click on IMPORT and then choose the METADATA file that you have already downloaded from the SSO SERVICE PROVIDER SETTINGS
Click on CONFIGURE
Go to Admin settings
Click on ADD APPLICATION in the top right corner
Fill out all fields like on the following image but with your own SSO Url, don’t forget to choose an icon and click on SAVE.
Final Step
Log out of DocBits.
Go back to the burger menu in Infor and select the icon you just created.
And you will be taken to the Dashboard of DocBits.
First check which type of M3 your organization is currently using, V1 or V2.


How to set up SSO with INFOR Portal V2
Login Details to Cloud
Credentials are mandatory for accessing the Infor Cloud environment. The user should have the roles "Infor-SystemAdministrator" and "UserAdmin".
Config Admin Details (DocBits)
You should have received an email from FellowPro AG with the login details for the DocBits SSO Settings page. You will need a login and password.
Certificate
You can download the certificate in DocBits under SSO Service Provider Settings
URL starts with https://mingle-portal.eu1.inforcloudsuite.com/<TENANT_NAME> followed by your personal extension
Choose the option Cloud Identities and use your login details
On the new Portal, the way you access this menu now is by selecting the OS option in the left menu. If you do not see it in the menu, click on See More to view all applications.
Select Security, in the OS menu, to be taken to the area for adding a new service provider. The steps are the same from this point on.
Then you need to select in the left hand side menu the option Security Administration and Service Provider.
You will see this window with the Service Providers.
Now click on the “+” sign and add our DocBits as Service Provider.
Log in on URL https://app.docbits.com/ with the login details you received from us.
Go to SETTINGS (on top bar) and select INTEGRATION, under SSO Service Provider Settings you will find all the information you need for the following steps.
Download the certificate
Filling the Service Provider with the help of SSO Service Provider Settings in DocBits
Application Type
DEFAULT_SAML
Display Name
DocBits
Entity ID
See Entity ID under SSO SERVICE SETTINGS
SSO Endpoint
Copy the SSO URL from SSO SERVICE SETTINGS and paste it in the SSO Endpoint field.
SLO Endpoint
Copy the SLO URL from SSO SERVICE SETTINGS and paste it in the SSO Endpoint field.
Signing Certificate
Upload the appropriate .cer file you have downloaded in step 3c) from SSO SERVICE SETTINGS
Name ID Format and Mapping
email address
When you have filled out everything remember to save it with the disk icon above Application Type
Enter the service provider DocBits again.
Click on view the Identity Provider Information underneath.
File looks like this: ServiceProviderSAMLMetadata_10_20_2021.xml
Import the SAML METADATA in the SSO Settings.
Go to IDENTITY SERVICE PROVIDER SETTINGS, which is located under INTEGRATIONS in SETTINGS. Enter your Tenant ID (e.g. FELLOWPRO_DEV) and underneath that line you see the Upload file and the IMPORT Button, where you need to upload the previously exported SAML METADATA file.
Click on IMPORT and then choose the METADATA file that you have already downloaded from the SSO SERVICE PROVIDER SETTINGS
Click on CONFIGURE
Final Step
Log out of DocBits.
Go back to the left menu in Infor and select the application you just created.
You will be taken to the Dashboard of DocBits.
Using DocBis with your Microsoft Login without using a (separate) password
Perform the following steps to add SAML SSO in Azure AD:
In Azure, go to your `Azure Active Directory` console
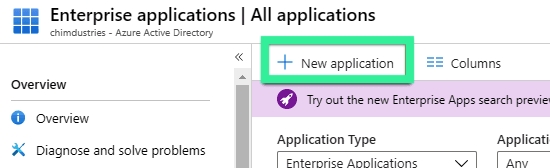
In the left panel, click `Enterprise applications`
Click `+ New application
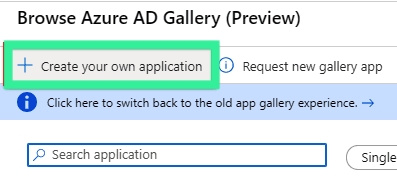
Click `+ Create your own application`
Enter a name for your application. Keep the remaining default selections.
Click on `Create`
Next, assign users or groups to the SSO configuration.
Important: You should already have created users and groups in Azure AD. If you don’t have any users or groups, create them now before proceeding.
Under `Getting Started`, click `Assign Users and Groups`.
Click `+ Add user`
Select the users and groups you want to assign to this SSO configuration. These users will be able to authenticated in DocBits (using SSO).
Click `Select`
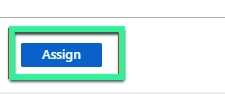
When you’re satisfied with your selection, click `Assign`
Go to the `Groups` view list and find the assigned groups.
Next, you need to finish setting up single-sign-on in Azure.
In the left panel, click `Single sign-on`
Click `SAML`
Click `Upload metadata file`
Upload the DocBits metadata.xml, which you can find in the Settings menu Integration under SSO Service Provider Settings of your DocBits account.
Edit the `Basic SAML Configuration`
Check if the `Entity ID`, `ACS URL`, `Sign on URL` and `Logout URL` are populated right.
Download the newly generated Federation Metadata XML.
Upload the FederationMetadata.xml into the Identity Service Provider Settings of your DocBits account which you can find in the Settings menu Integration.
Click on OS in the left menu (like before), you will be taken to a menu where you need to select Portal. Next, click on + Add Application on the right. Fill in the following information, the URL field is the SSO Endpoint URL from the Integration area in your DocBits settings. A Logical ID will also be generated for you, when done click save.