Loading...
Loading...
Loading...
Loading...
Loading...
Loading...
Loading...
Loading...
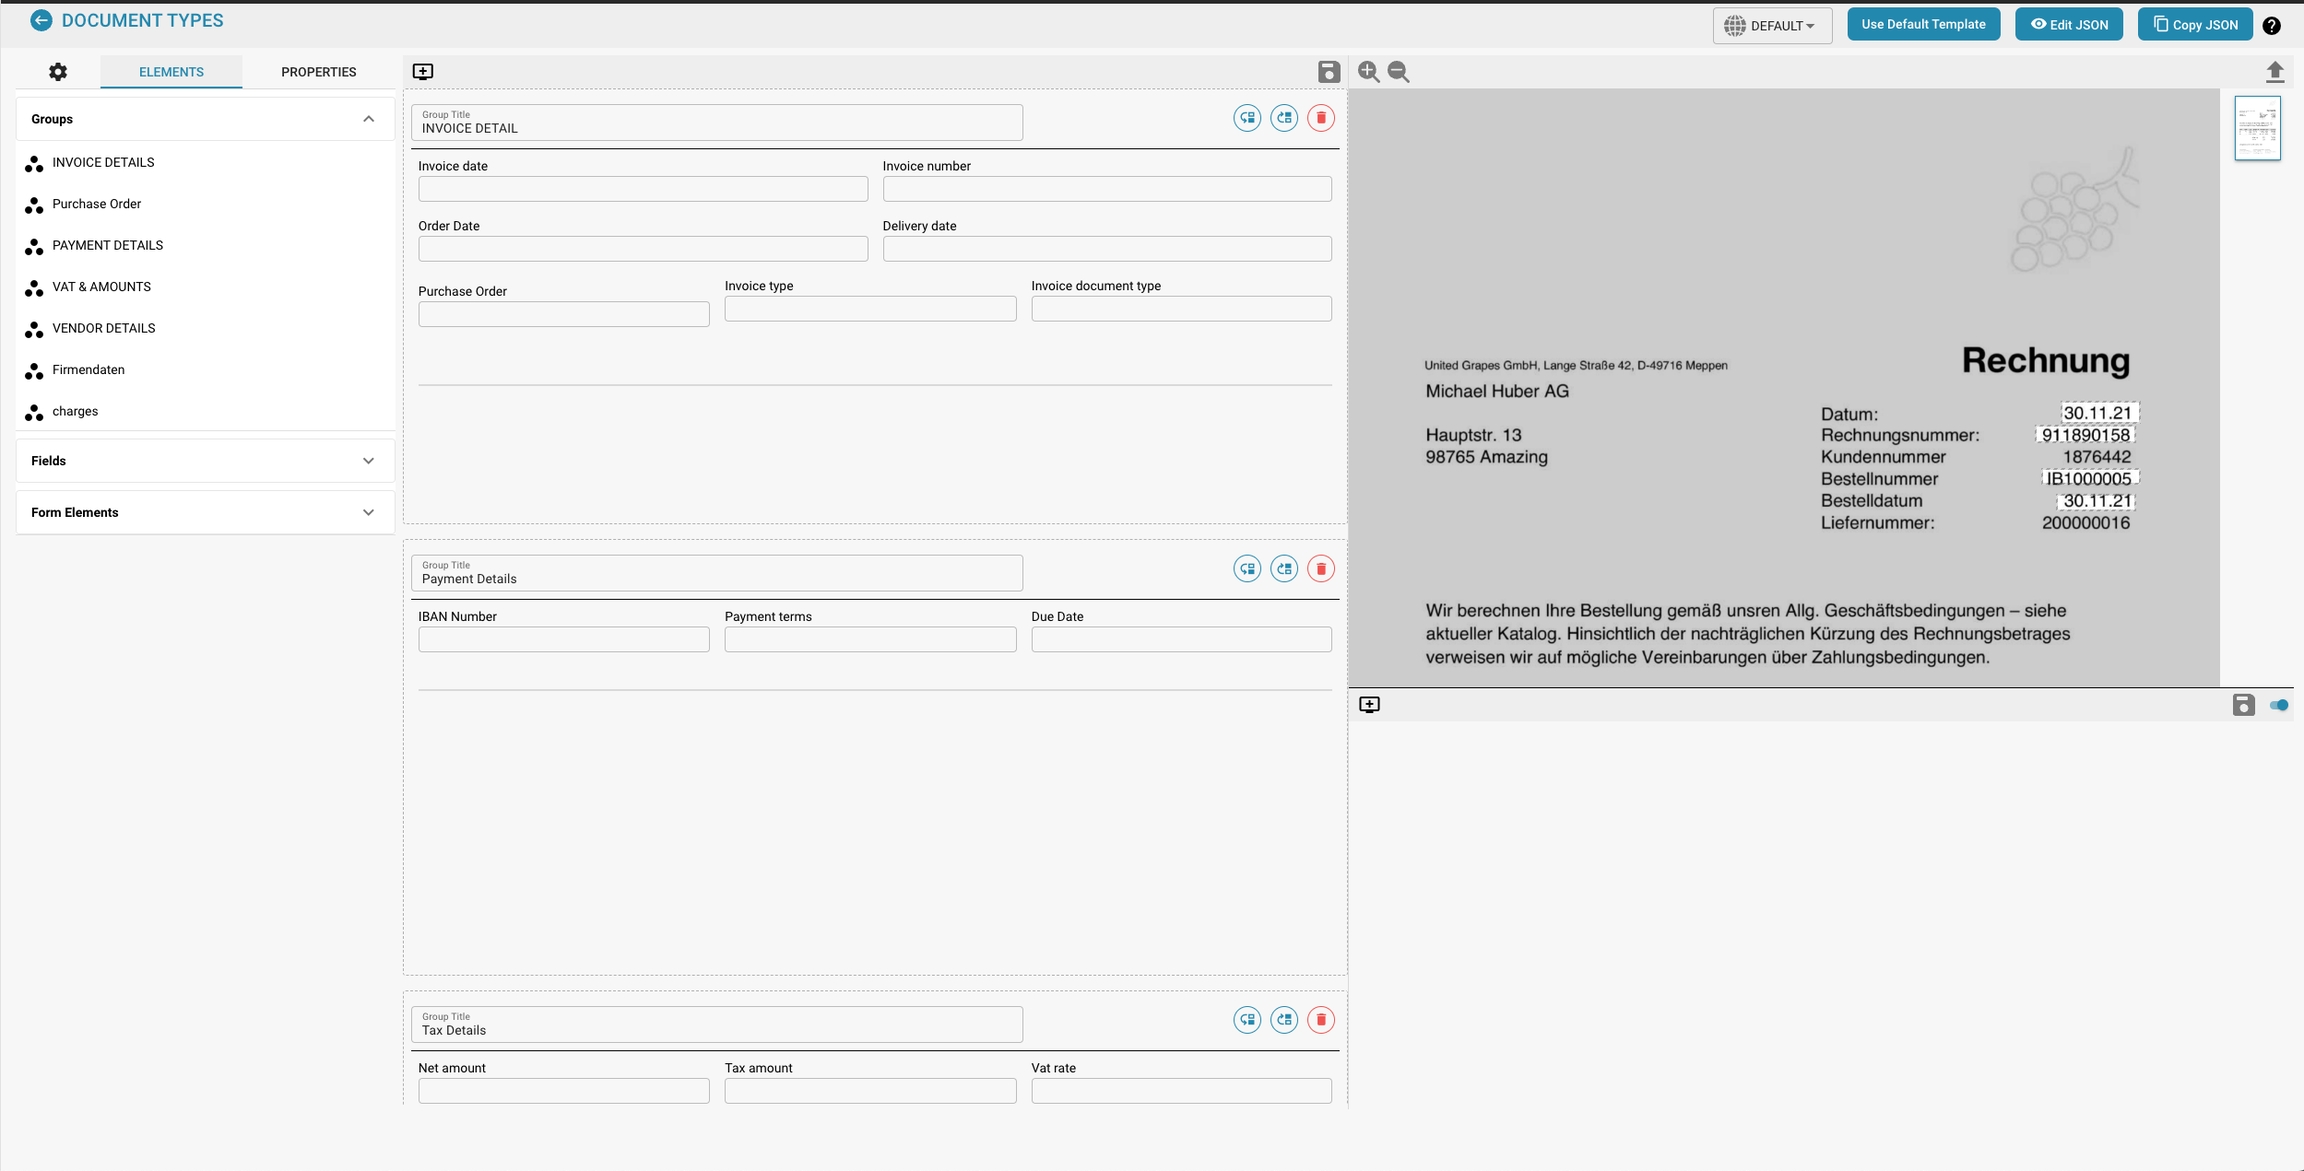
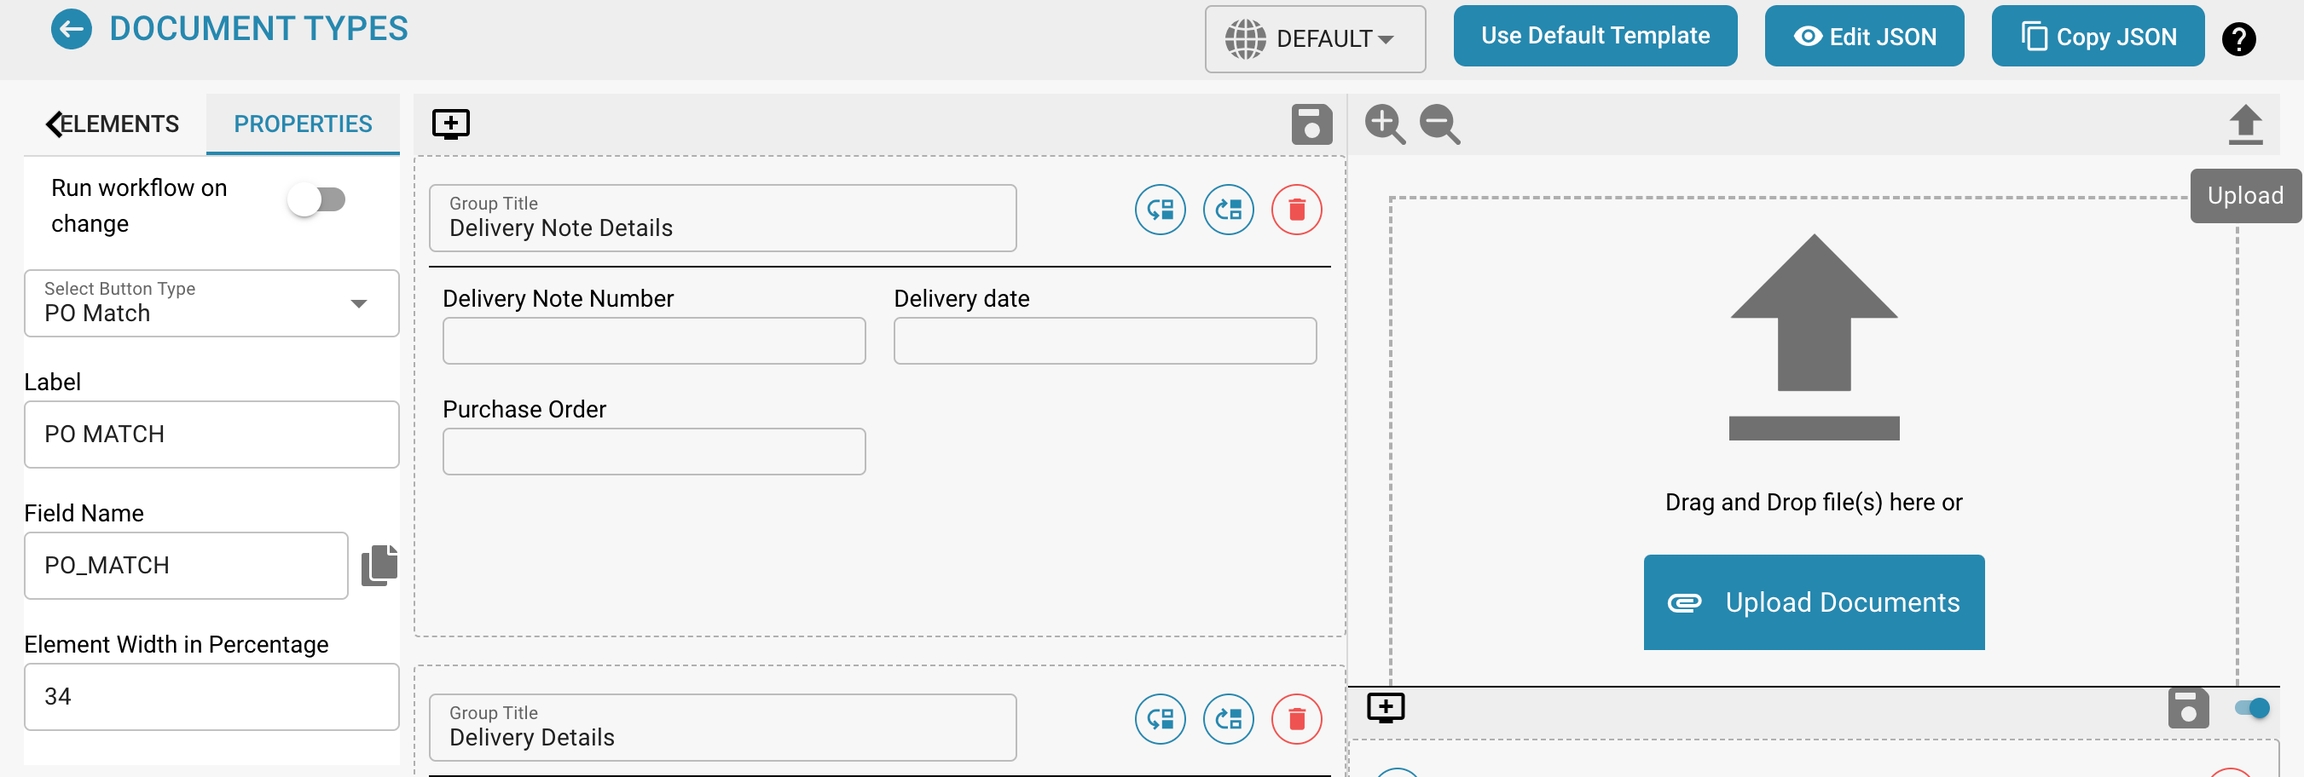
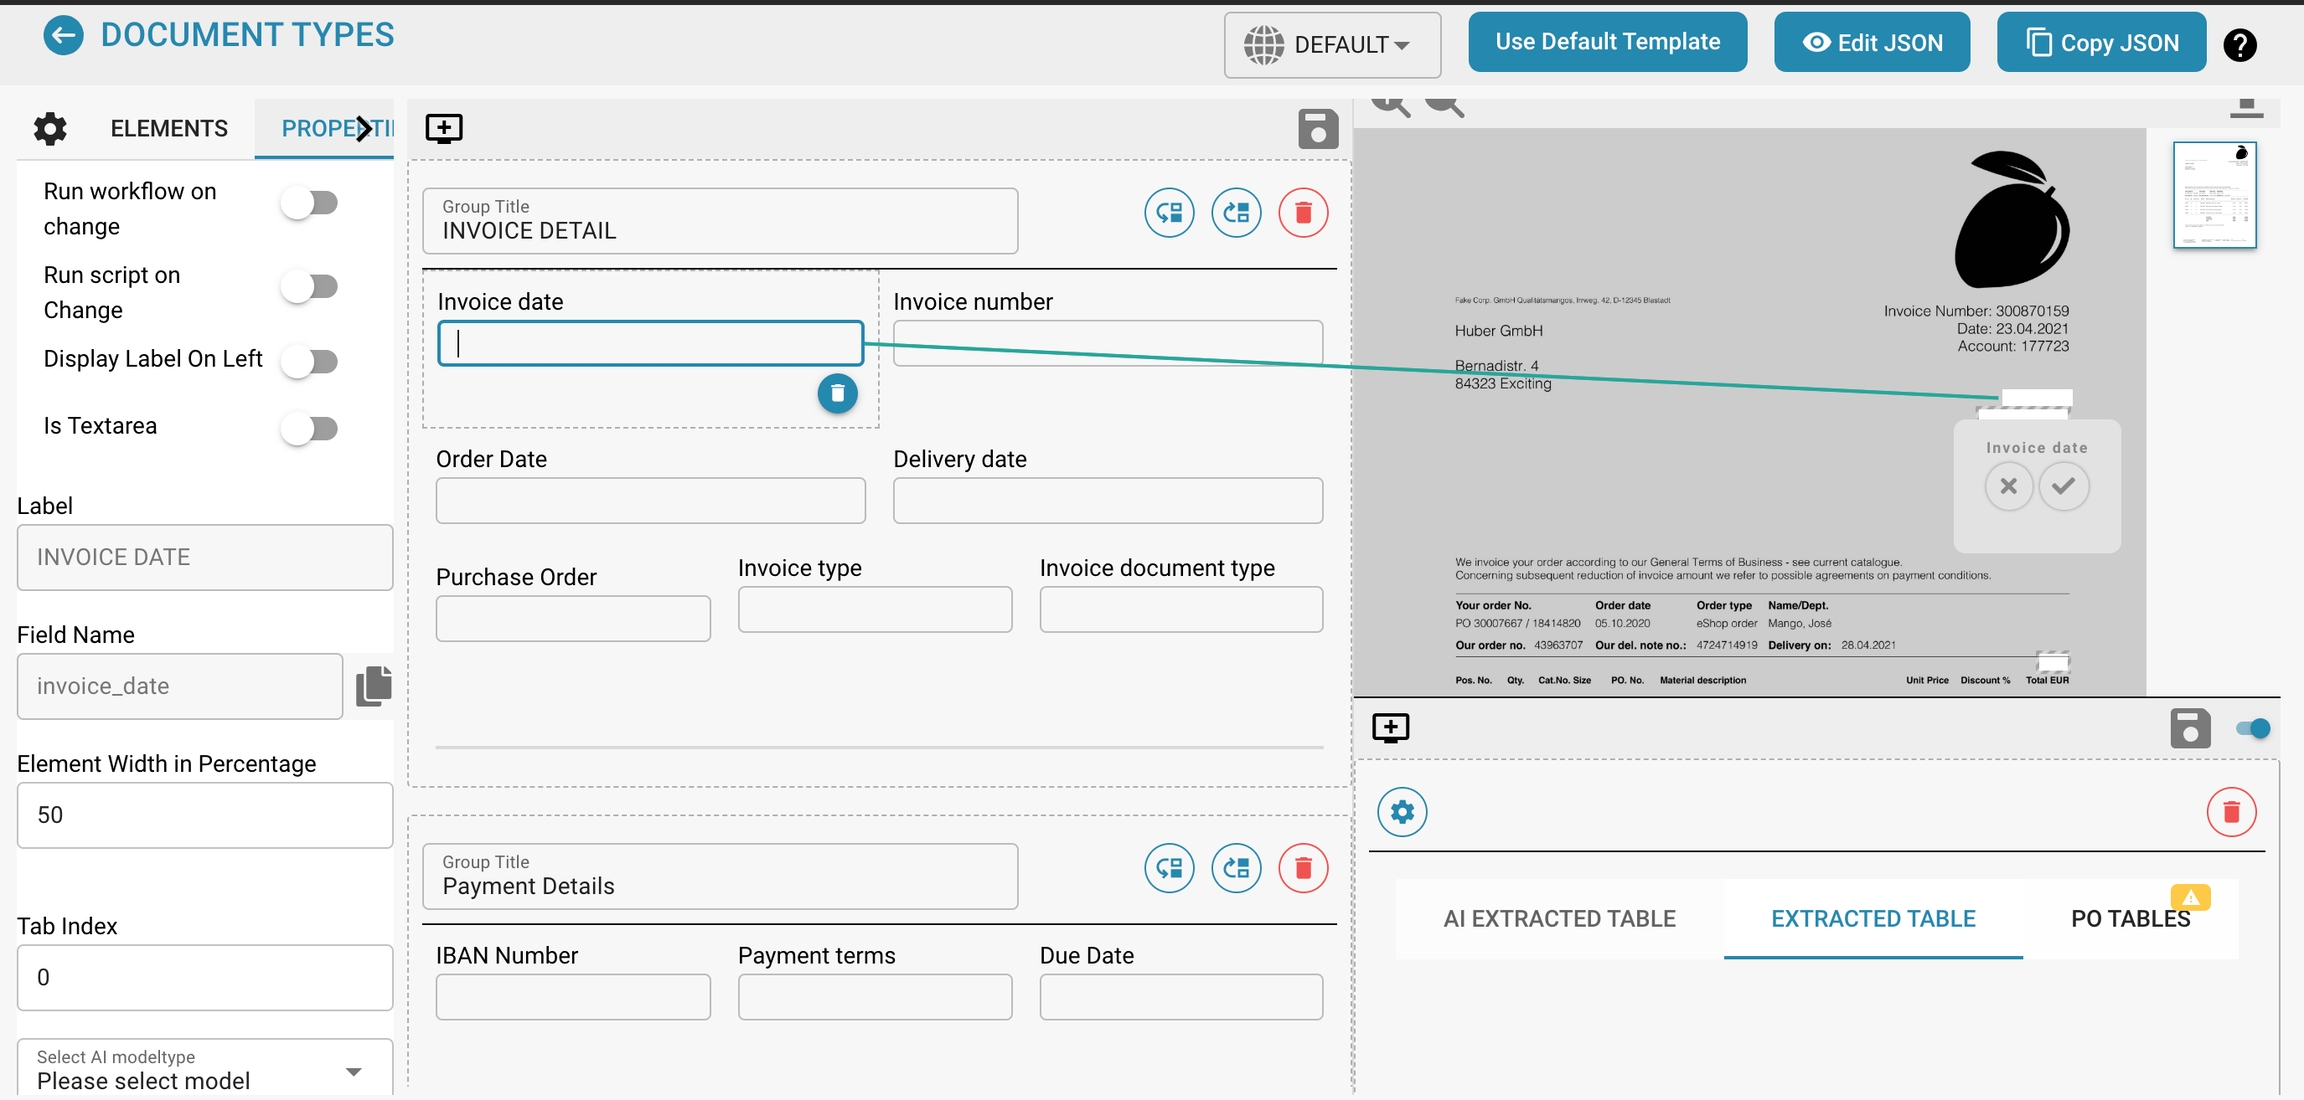
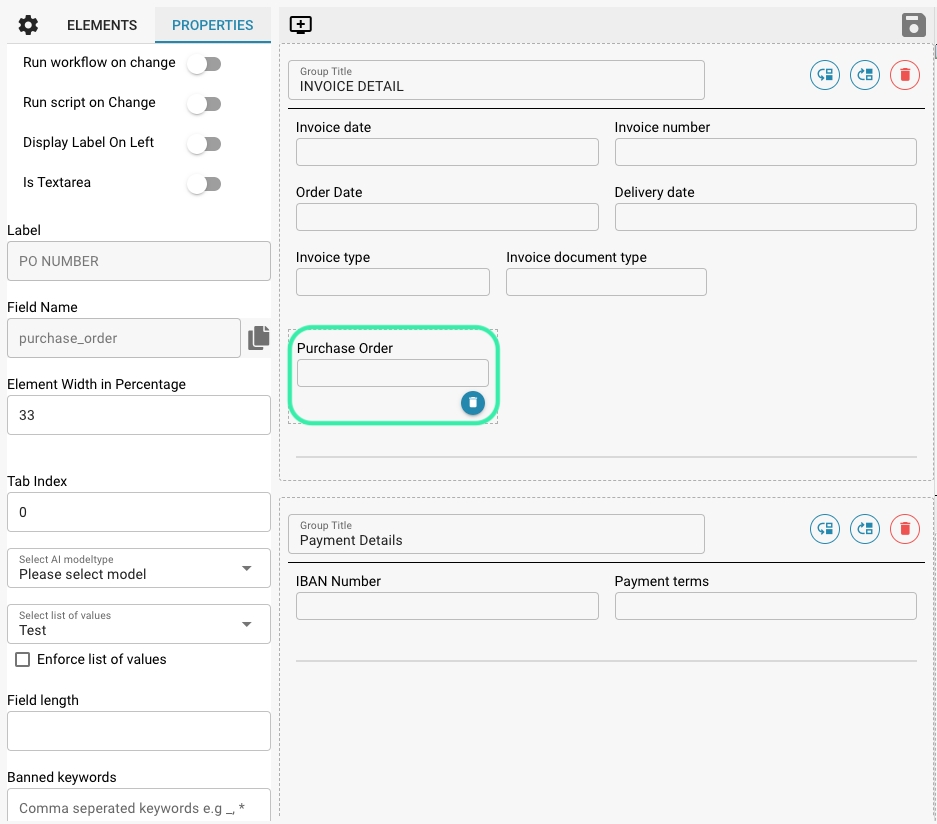
The Layout Manager allows administrators to visually configure and modify the layout of document types by setting properties for various data fields and groups within a document. This interface helps ensure that the extraction models and manual data entry points align precisely with the document's structure as scanned or uploaded into Docbits.
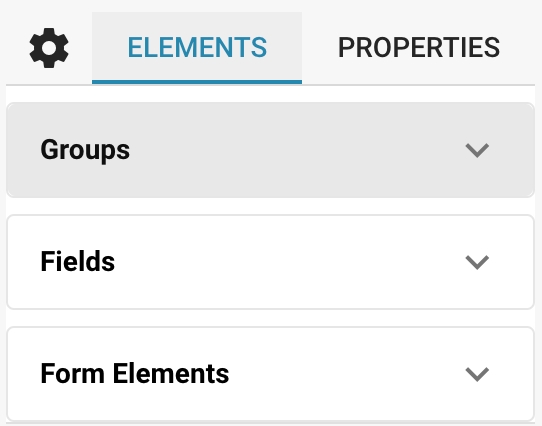
Groups and Fields:
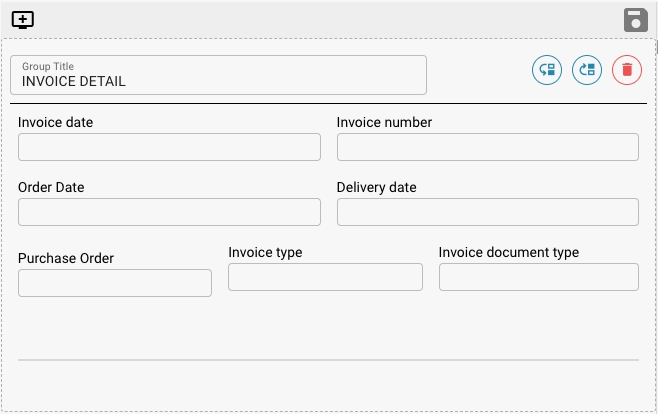
Groups: Organizational units within a document type that categorize related fields (e.g., Invoice Details, Payment Details). These can be expanded or collapsed and arranged to mirror the logical grouping in the actual document.
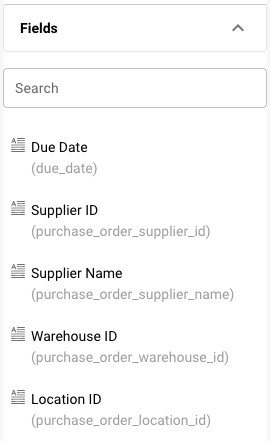
Fields: Individual data points within each group (e.g., Invoice Number, Payment Terms). Each field can be customized for how data is captured, displayed, and processed.
Properties Panel:
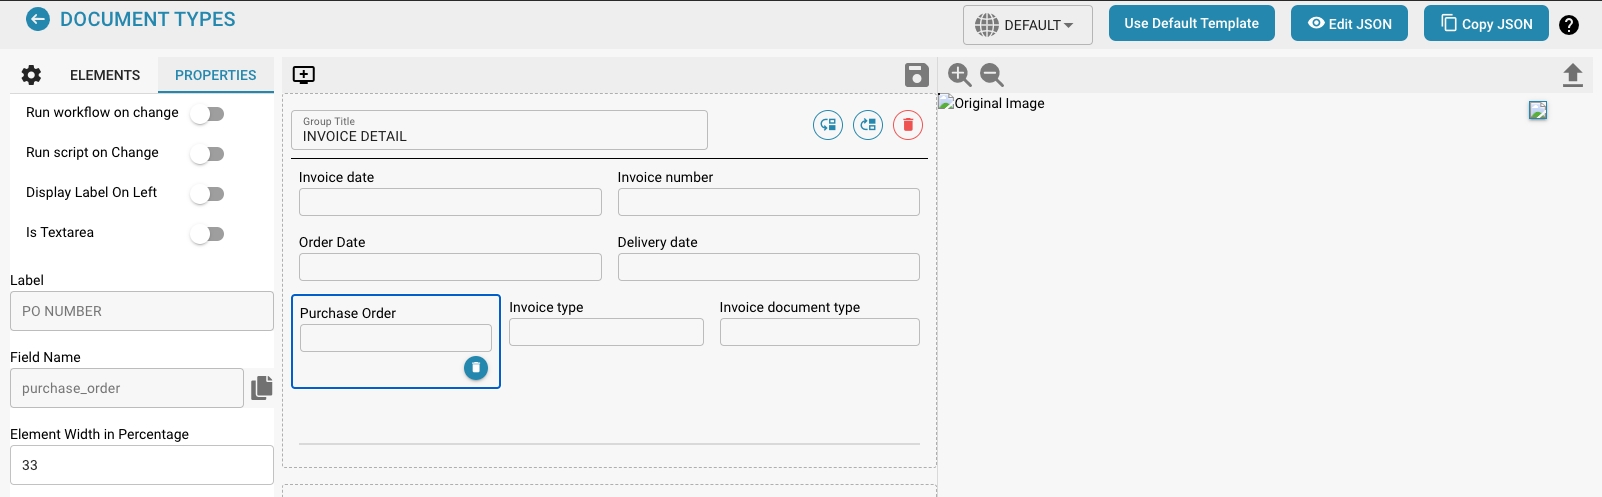
This panel displays the properties of the selected field or group, allowing for detailed configuration, such as:
Label: The visible label for the field in the user interface.
Field Name: The technical identifier used within the system.
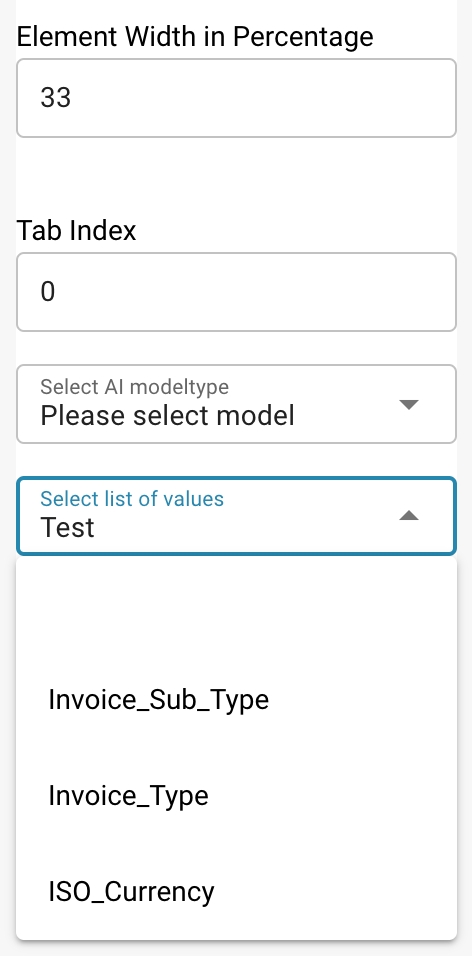
Element Width in Percentage: Determines the width of the field in relation to the document layout.
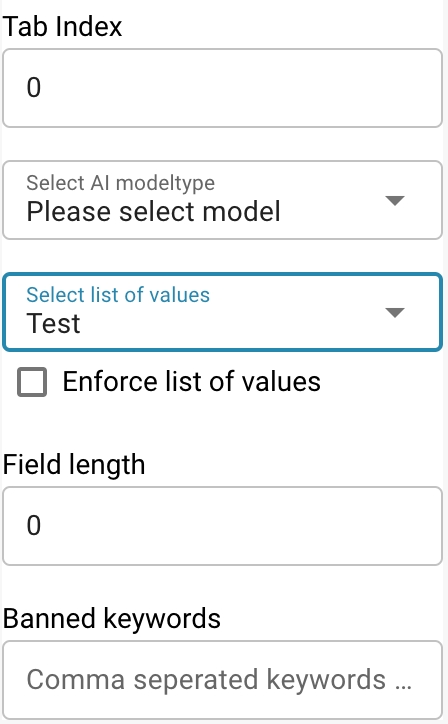
Tab Index: Controls the tabbing order for navigation.
Run Script on Change: Whether to execute a script when the field value changes.
Display Label On Left: Whether the label is displayed to the left of the field or above it.
Is Textarea: Specifies if the field should be a textarea, accommodating larger amounts of text.
Select Model Type: Option to select which model type will handle the extraction of this field.
Field Length: Maximum length of data to be accepted in this field.
Banned Keywords: Keywords that are not allowed within the field.
Template Preview:
Shows a real-time preview of how the document will appear based on the current layout configuration. This helps in ensuring that the layout matches the actual document structure and is vital for testing and refining the document processing setup.
A Layout Manager enables an orderly and structured presentation of information.
Setting placement rules for different data elements ensures that information is presented consistently and clearly.
Using a Layout Manager enables users to capture information more efficiently.
A well-designed layout results in users knowing intuitively where to enter specific data, which speeds up data capture and reduces the risk of errors.
Consistent layouts ensure consistency in documentation.
When different documents use the same Layout Manager, a consistent presentation of information across different documents is ensured.
This is especially important in environments where many different users access or collaborate on documents.
A Layout Manager enables the appearance of documents to be customized depending on requirements.
Depending on the type of document or specific requirements, layouts can be customized to better present different types of data or information.
A well-configured layout manager makes it easier to scale documents.
When new data needs to be added or requirements change, the layout manager can be customized to easily handle those changes without the need for a major redesign.
Overall, using a layout manager is critical to ensure that data is captured and organized accurately. A well-designed layout improves the user experience, promotes efficiency in data entry, and contributes to the consistency and adaptability of documents.
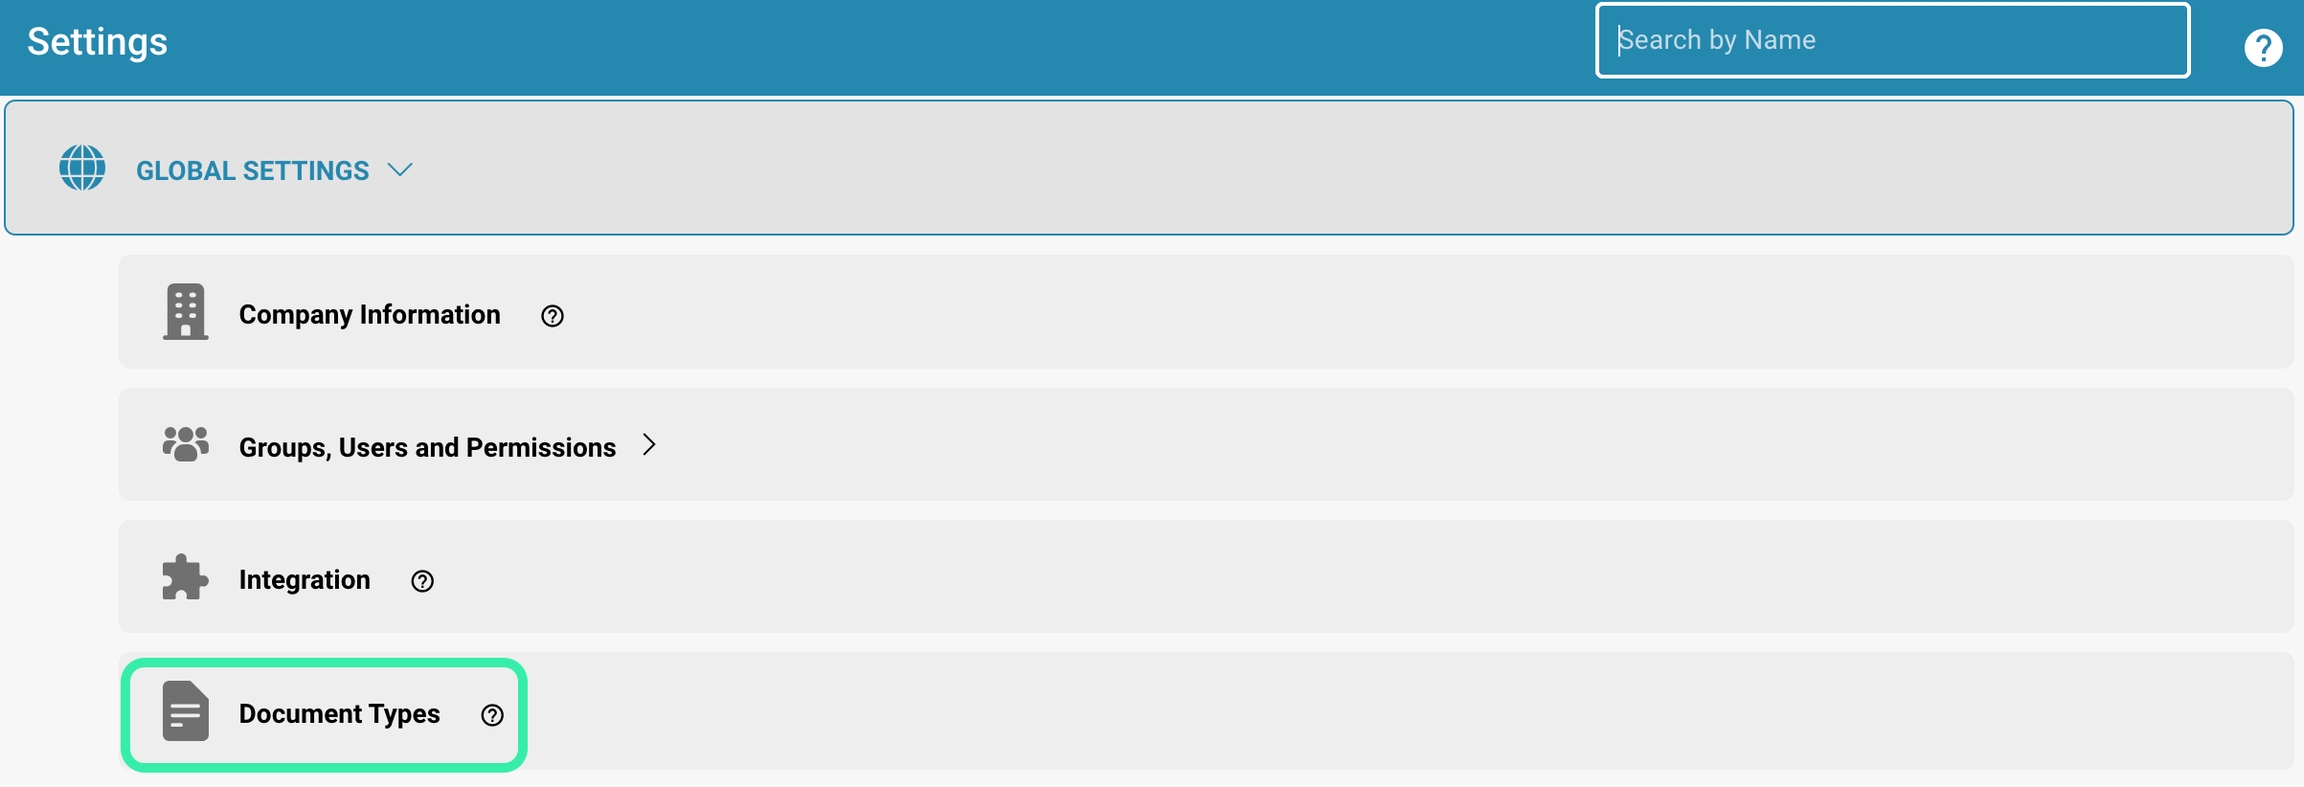
Log in to DocBits and navigate to the area where you want to use the Layout Manager.
You can find this option in "Manage Document Types".
Select the document type you want to edit.
The Layout Manager will display the structure of that document type.
In the Layout Manager you will see a tree structure that represents the groups and fields of the selected document type.
You can navigate through this structure to edit the areas you want.
Click the "Create new group" button, depending on whether you want to add a new group or field.
Enter the name of the new group or field and select any settings you want, such as the type of field (text, number, date, etc.).
Select the group or field you want to remove.
Click the "Delete" button or use the appropriate keyboard shortcut (usually "Delete" or "Del").
Double-click the group or field you want to change.
Change any properties you want, such as the name, position, size, or field type settings.
Drag and drop groups or fields to change their order or place them inside or outside other groups.
Don't forget to save your changes before you leave the Layout Manager.
Click the "Save" button.
By following these steps, you can effectively navigate DocBits' Layout Manager and edit groups as well as fields within a document type. This allows you to customize the structure and appearance of your documents according to your needs.
Group related fields together to create a logical and intuitive structure. This makes it easier for users to navigate and enter data.
Arrange fields so that frequently used or important information is easily accessible and placed in a prominent location.
Identify all required data fields and mark them accordingly. Ensure users are prompted to enter all necessary information to avoid incomplete records.
Use validation rules to ensure that entered data conforms to expected formats and criteria.
Use clear and precise labels for fields to help users enter the expected data.
Add instructions or notes when additional information is required to ensure users provide the correct data.
Test the layout and data entry thoroughly to ensure that all data is captured and stored correctly. Collect feedback from users and make adjustments to continuously improve user experience and data integrity.
After you have made the desired customizations in the Layout Manager, look for the "Save" button to save the changes.
Click this button to save your changes in the Layout Manager. This backs up your layout customizations and ensures that they are available for future editing sessions.
Once your changes are saved in the Layout Manager, they are usually automatically applied to the document processing workflow that uses that specific document type.
New documents based on this template will inherit the updated layout settings when they are created. This means that the new documents will include the new groups, fields, or other layout customizations you made in Layout Manager.
Existing documents already created using this template may be treated differently depending on your software and configuration. In some cases, changes may be automatically applied to pre-existing documents, while in other cases, manual adjustments may be required to bring existing documents into line with the updated layout settings.
After you have saved the layout changes and they have been applied to the document processing workflow, it is advisable to test the changes to ensure that they work as intended.
Create new test documents or review existing documents to ensure that the updated layout settings are applied correctly and that data is captured and displayed as expected.
By following these steps, you can effectively save changes in Layout Manager and apply them to the document processing workflow. This ensures a smooth integration of your layout customizations into the document creation and processing process.
You can usually find the Template Preview option in the template editor interface.
Select the template whose layout you want to check.
This can be an existing template you want to make changes to or a new template you want to create.
Change the layout settings as needed. This can include adding, removing or adjusting groups, fields, columns, rows, fonts, etc.
As you change the layout settings, the preview updates in real time.
You can immediately see how your changes affect the look and structure of the template.
Take advantage of the ability to interactively customize the layout by moving, resizing, or making other adjustments to elements while checking the effects in real time in the preview.
Experiment with different layout configurations to find the best design for your needs.
Use the template preview to see how each change affects the final look.
Once you are happy with the layout, save your changes.
Depending on the software, you may also be able to find the option to commit your changes directly to update the template for use in other documents or processes.
Using the template preview allows you to make sure your layout meets your desired needs before committing changes. This allows you to efficiently customize the design and structure of your documents and ensure that they meet the desired visual and functional standards.
Start by selecting the right field type for your data.
This depends on what type of information the field will contain.
Possible field types include text, number, date, drop-down menu, checkbox, etc.
Set validation rules to ensure that the data entered meets the expected criteria.
This may include checking for certain string patterns, numeric limits, date formats, or other conditions.
If certain fields typically have a default value, you can set that as the default value.
This makes data entry easier because users don't have to enter the same value every time.
Determine which user groups should have access to the field and what type of access rights they have.
This can include read, write, or edit rights.
In some cases, data from one field needs to be linked to data from another field or data source.
Configure appropriate links or relationships to ensure consistent data integration.
Determine under what conditions a field should be visible or hidden.
This can be useful for dynamically adapting the user interface based on certain data or user actions.
If necessary, enable historization of fields to track changes historically.
This allows you to track changes to the data and monitor the history of data changes.
Add notes or descriptions to explain to users how to use the field or what type of data is expected.
By following these steps and configuring the appropriate field properties, you can ensure that your documents meet specific requirements for data handling, user access, and data accuracy.
Check the configuration of the fields in the Layout Manager and make sure they match the actual fields in the scanned documents.
Check that the positions and dimensions of the fields in the layout are correct and that they cover all relevant information.
Check the validation rules and format settings for the affected fields to make sure that the expected data can be captured correctly.
Make sure that the OCR (Optical Character Recognition) or other data capture technologies are properly configured and calibrated to ensure accurate extraction of the data.
Check the validation rules for fields to make sure they are appropriate and configured correctly.
Adjust the validation rules if necessary to ensure that they meet the requirements and formats of the captured data.
Revise the layout to improve the structure and organization of fields and ensure that important information is easily accessible.
Run user testing to get feedback on the usability of the layout and make adjustments to increase efficiency.
By applying these best practices and troubleshooting as appropriate, you can create efficient and accurate document layouts that enable smooth data capture and processing.