> For the complete documentation index, see [llms.txt](https://docs.docbits.com/llms.txt). Markdown versions of documentation pages are available by appending `.md` to page URLs; this page is available as [Markdown](https://docs.docbits.com/chinese/infor-ji-cheng-yu-pei-zhi/importing-customer-master-data/importing-via-the-api/supplier-bod.md).

# 导入供应商（Supplier BOD）

如何使用 API 手动将 Supplier BOD 导入 DocBits

供应商主数据通常会通过 ION 数据流自动传入 DocBits。本页介绍如何手动发送 **Supplier BOD**，适用于重新导入供应商、导入未成功送达的一批数据，或在启用自动数据流之前测试字段映射。

## 通过两种方式发送同一个 BOD

有两个端点，功能相同。唯一的区别是提交 BOD 的方式：

<figure><img src="https://1870485400-files.gitbook.io/~/files/v0/b/gitbook-x-prod.appspot.com/o/spaces%2FlPczlNw8zzYNLfjfispX%2Fuploads%2Fgit-blob-ac06f0206e641c440ba847a833682a7ae9a9f1d4%2Fimport-supplier-endpoints.png?alt=media" alt="两个供应商导入端点"><figcaption><p>上传文件，或在请求中发送 XML</p></figcaption></figure>

| 端点                         | 适用情况                                                                                              |
| -------------------------- | ------------------------------------------------------------------------------------------------- |
| `/import/supplier_bod`     | 您有一个 **XML 文件**形式的 BOD，并希望上传该文件。                                                                  |
| `/import/supplier_bod_xml` | 您希望在请求中直接发送 **XML 内容**，而不是上传文件。BOD 必须封装在 JSON 中，因此适合较短的 XML，或由其他系统调用 API 的场景；如果要手动发送完整 BOD，请上传文件。 |

下文将分别介绍这两个端点。无论使用哪种方式，步骤 1 和 2 都相同。

## 开始之前

您需要准备：

* **API 密钥。** 如果还没有，请参阅 [API 密钥管理](/chinese/guan-li-yu-she-zhi/settings/global-settings/integration/api-key-management.md)。
* **BOD**——`SyncSupplierPartyMaster` 或 `SyncRemitToPartyMaster` XML 文件，或其内容。
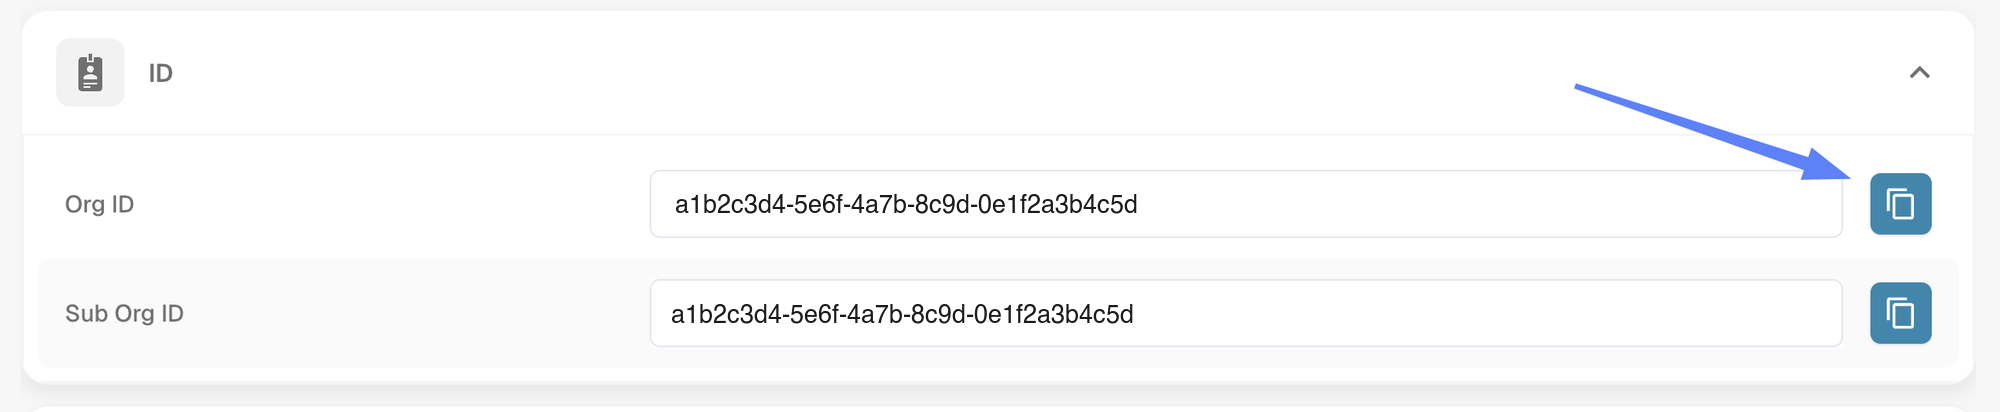
* **组织 ID（Org ID）**，可在 **设置 → 集成与 SSO** 的 **ID** 区域中找到。

<figure><img src="https://1870485400-files.gitbook.io/~/files/v0/b/gitbook-x-prod.appspot.com/o/spaces%2FlPczlNw8zzYNLfjfispX%2Fuploads%2Fgit-blob-69a7acf7d087b08291b150c30c791482afc308b5%2Fimport-org-id.png?alt=media" alt="ID 区域显示 Org ID 和 Sub Org ID 及其复制按钮"><figcaption><p>设置 → 集成 &#x26; SSO → ID</p></figcaption></figure>

{% hint style="info" %}
**Sub Org ID** 显示页眉中当前所选的子组织。如果选择了 **CROSS**（即跨所有子组织查看的视图），这里显示的值与 **Org ID** 相同。如果需要特定子组织的 ID，请先切换到该子组织。

如果您不打算导入到某个特定子组织，请将 `sub_org_id` 字段留空。
{% endhint %}

## 操作步骤

### 1. 打开 API 链接

打开与您所使用的环境和区域对应的 API 测试界面：

* [Sandbox API（欧洲）](https://eu.sandbox.api.docbits.com/docs#/import/import_supplier_bod_import_supplier_bod_post)
* [Sandbox API（美国）](https://us.sandbox.api.docbits.com/docs#/import/import_supplier_bod_import_supplier_bod_post)
* [Production API（欧洲）](https://eu.api.docbits.com/docs#/import/import_supplier_bod_import_supplier_bod_post)
* [Production API（美国）](https://us.api.docbits.com/docs#/import/import_supplier_bod_import_supplier_bod_post)

点击所需端点将其展开。

{% hint style="info" %}
请选择组织所在的区域，也就是您登录 DocBits 时使用的区域。欧洲和美国环境相互独立，因此如果将导入请求发送到错误的区域，数据不会出现在您的组织中。

没有区域前缀的地址——`api.docbits.com` 和 `sandbox.api.docbits.com`——指向欧洲。您可能会在旧版文档和现有配置中看到这些地址；它们与上方的 `eu.` 地址指向同一环境。
{% endhint %}

### 2. 授权

在完成授权之前，**import** 下的所有内容都会被锁定。您需要填写两项内容：组织信息和 API 密钥。

* 点击端点右侧的**锁形图标**。

<figure><img src="https://1870485400-files.gitbook.io/~/files/v0/b/gitbook-x-prod.appspot.com/o/spaces%2FlPczlNw8zzYNLfjfispX%2Fuploads%2Fgit-blob-e540071e0601ebb33c3338f8cb54345645f60f08%2Fimport-supplier-lock.png?alt=media" alt="端点上的锁形图标已突出显示"><figcaption><p>点击锁形图标以打开授权对话框</p></figcaption></figure>

* 系统会打开 **Available authorizations** 对话框，其中包含两项。
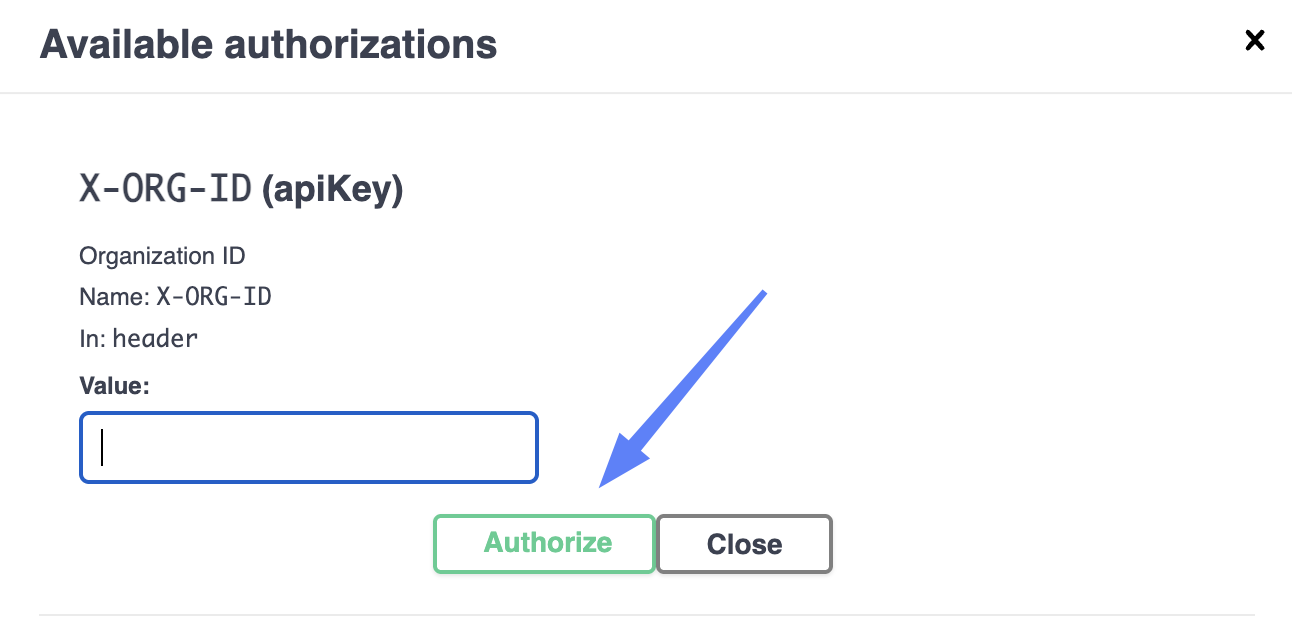
* 将您的 **Org ID** 粘贴到 **X-ORG-ID**，然后点击 **Authorize**。

<figure><img src="https://1870485400-files.gitbook.io/~/files/v0/b/gitbook-x-prod.appspot.com/o/spaces%2FlPczlNw8zzYNLfjfispX%2Fuploads%2Fgit-blob-6b3307147ed9a09fe0d807606f2b9a1976202922%2Fimport-authorize-orgid.png?alt=media" alt="X-ORG-ID 授权项及其空白值字段"><figcaption><p>X-ORG-ID — 粘贴 Org ID，然后点击 Authorize</p></figcaption></figure>

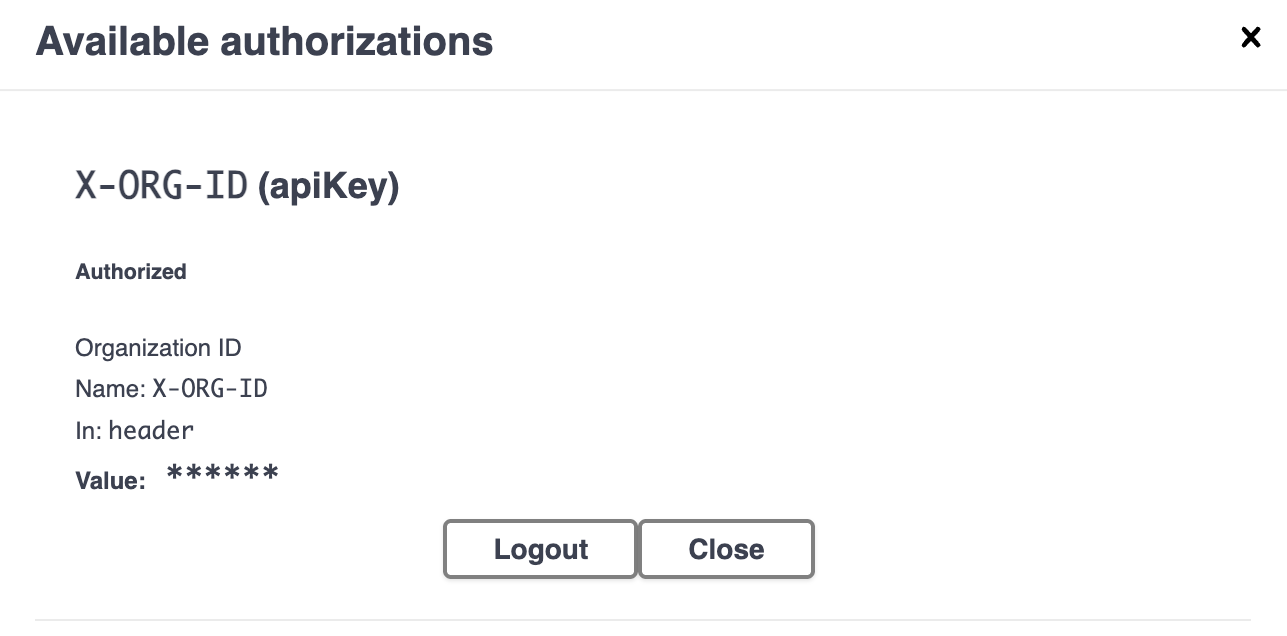
<figure><img src="https://1870485400-files.gitbook.io/~/files/v0/b/gitbook-x-prod.appspot.com/o/spaces%2FlPczlNw8zzYNLfjfispX%2Fuploads%2Fgit-blob-e83dc86efffd638908e3a4ce495d38d60b8a71f2%2Fimport-authorize-orgid-done.png?alt=media" alt="X-ORG-ID 授权项显示已授权状态"><figcaption><p>已设置 X-ORG-ID</p></figcaption></figure>

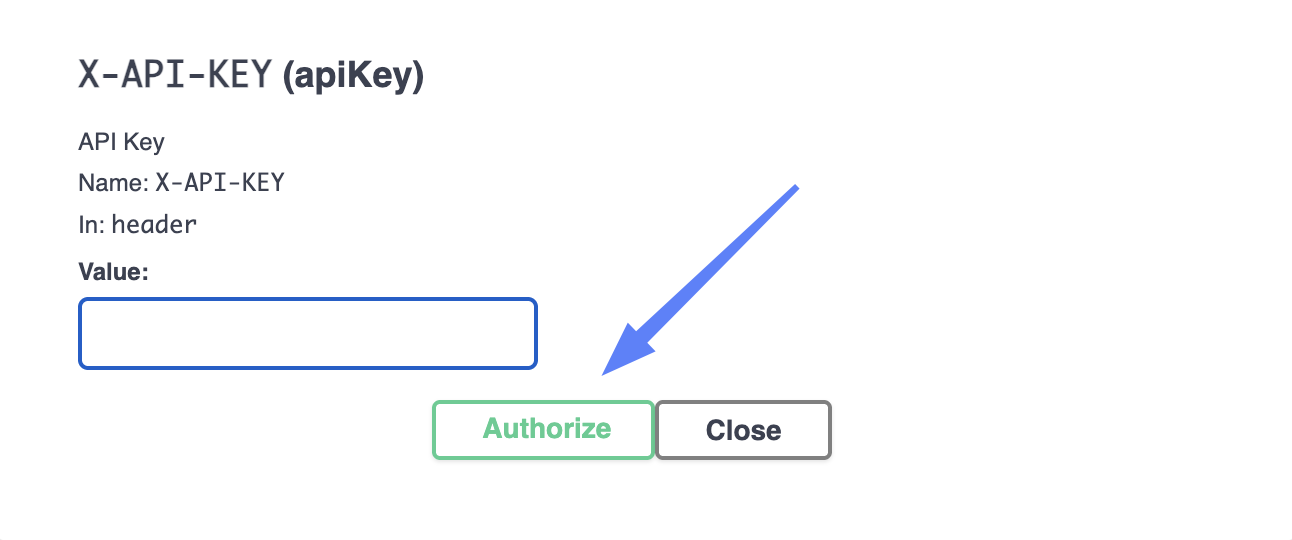
* 向下滚动到 **X-API-KEY**，粘贴您的 API 密钥，然后点击 **Authorize**。您可以在 DocBits 的 **设置 → 集成与 SSO** 中找到该密钥，位置在 **API Key** 区域；也可以[创建新密钥](/chinese/guan-li-yu-she-zhi/settings/global-settings/integration/api-key-management.md#creating-an-api-key)。

<figure><img src="https://1870485400-files.gitbook.io/~/files/v0/b/gitbook-x-prod.appspot.com/o/spaces%2FlPczlNw8zzYNLfjfispX%2Fuploads%2Fgit-blob-d71e3822513f4b384814c72be604d42392a96744%2Fimport-authorize-apikey.png?alt=media" alt="X-API-KEY 授权项及其空白值字段"><figcaption><p>X-API-KEY — 粘贴密钥，然后点击 Authorize</p></figcaption></figure>

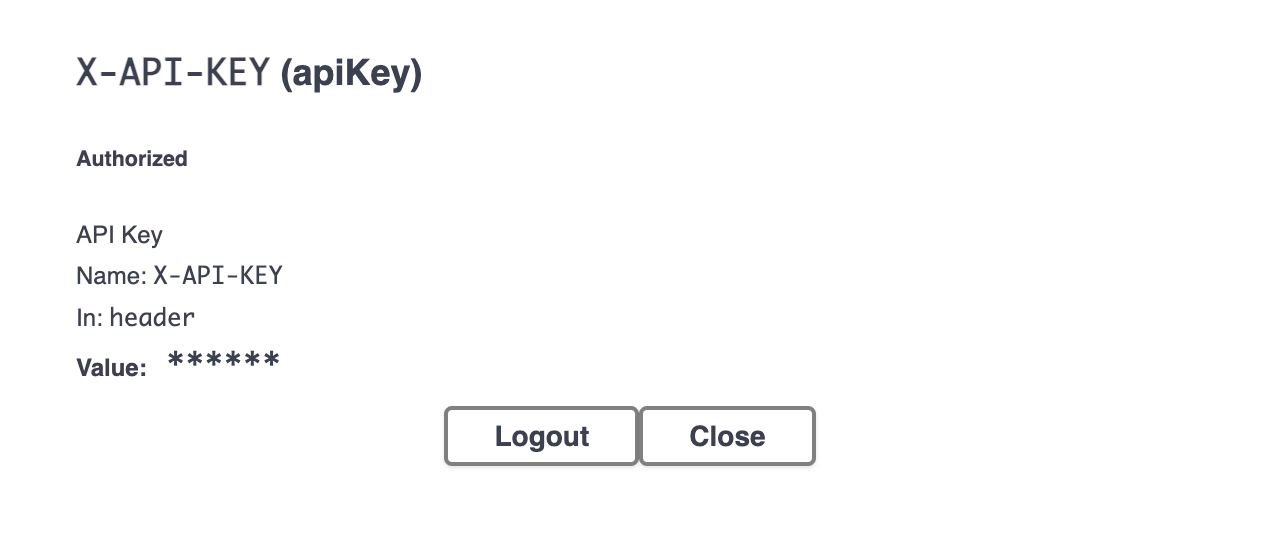
<figure><img src="https://1870485400-files.gitbook.io/~/files/v0/b/gitbook-x-prod.appspot.com/o/spaces%2FlPczlNw8zzYNLfjfispX%2Fuploads%2Fgit-blob-afe5fadddbafde1b6847d77a1521710cd14622d3%2Fimport-authorize-apikey-done.png?alt=media" alt="X-API-KEY 授权项显示已授权状态"><figcaption><p>已设置 X-API-KEY</p></figcaption></figure>

* 点击 **Close**。

{% hint style="info" %}
只粘贴密钥本身，不要在前面输入 `Bearer`。重新加载页面或点击 **Logout** 之前，两项授权都会保持有效。
{% endhint %}

### 3. 填写字段

<figure><img src="https://1870485400-files.gitbook.io/~/files/v0/b/gitbook-x-prod.appspot.com/o/spaces%2FlPczlNw8zzYNLfjfispX%2Fuploads%2Fgit-blob-fbcec05eac7dbba3a57715fa4ecfc1dbff56303e%2Fimport-tryitout.png?alt=media" alt="端点上的 Try it out 按钮"><figcaption><p>点击 Try it out 可解锁表单</p></figcaption></figure>

点击 **Try it out**，然后填写所选端点的表单。

#### 上传文件 — `/import/supplier_bod`

<figure><img src="https://1870485400-files.gitbook.io/~/files/v0/b/gitbook-x-prod.appspot.com/o/spaces%2FlPczlNw8zzYNLfjfispX%2Fuploads%2Fgit-blob-fefcebdb4202694084a6ee544778df970914bd3b%2Fimport-supplier-bod-form.png?alt=media" alt="已填写的供应商导入表单"><figcaption><p>已填写的请求正文表单</p></figcaption></figure>

| 字段                          |                                                                                                  |
| --------------------------- | ------------------------------------------------------------------------------------------------ |
| **file**                    | 必填。点击 **Choose file**，然后选择供应商 BOD XML 文件。                                                        |
| **org\_id**                 | 您的 Org ID，也就是步骤 2 中填入 **X-ORG-ID** 的同一个值。在此处也填写该值，可以明确指定请求要写入哪个组织。该组织必须在您的 API 密钥权限范围内；否则请求会被拒绝。 |
| **sub\_org\_id**            | 只有在导入到某个特定子组织时才需要填写。                                                                             |
| **custom\_fields\_mapping** | 可选。将 BOD 中的额外字段读取到供应商的自定义字段中。请参阅下文的[自定义字段映射](#custom-field-mappings)。                            |

此处没有行映射字段，因为供应商主数据不包含行项目。

{% hint style="warning" %}
**`string` 是一个值，不是占位符。** Swagger 会在可选字段中填入 `string` 一词；如果您不清除该值，它就会原样发送。例如，`org_id` 为 `string` 的导入请求会失败。

对于不需要使用的可选字段，请清空字段。清空后，下方会启用 **Send empty value** 复选框，您可以勾选该选项。
{% endhint %}

#### 自定义字段映射 <a href="#custom-field-mappings" id="custom-field-mappings"></a>

映射字段接受 JSON 对象。**左侧的名称必须是 DocBits 自带的自定义字段之一**——供应商可使用 `custom_field_1` 到 `custom_field_5`。其他名称会被忽略，且不会显示警告，因此拼写错误看起来就像映射未生效一样。

右侧的值是要读取的 XPath。请勿添加命名空间前缀——DocBits 会自行添加：

```json
{"custom_field_2": "//SupplierPartyMaster/UserArea/Property/NameValue[@name='User defined 6']/text()"}
```

#### 粘贴 XML — `/import/supplier_bod_xml`

此端点不能直接接受粘贴的 BOD。**xml** 字段是一个对象，预填内容为 `{"xml": "string"}`。请将 `string` 替换为 BOD 内容，并保留外层引号和花括号：

```json
{
  "xml": "<SyncSupplierPartyMaster ...>...</SyncSupplierPartyMaster>"
}
```

{% hint style="warning" %}
BOD 位于 JSON 字符串中，因此 XML 中的每个双引号都必须转义为 `\"`——而 BOD 中有很多双引号。如果结果不是有效的 JSON，请求会因 **422** 错误而失败，且不会导入任何内容。

手动处理真实 BOD 时很繁琐，因此建议**上传文件**。
{% endhint %}

`org_id`、`sub_org_id` 和 `custom_fields_mapping` 字段的用法与上文完全相同。

{% hint style="warning" %}
执行前，请确认指向的环境和组织是否正确。导入会直接写入该组织的主数据。
{% endhint %}

### 4. 执行

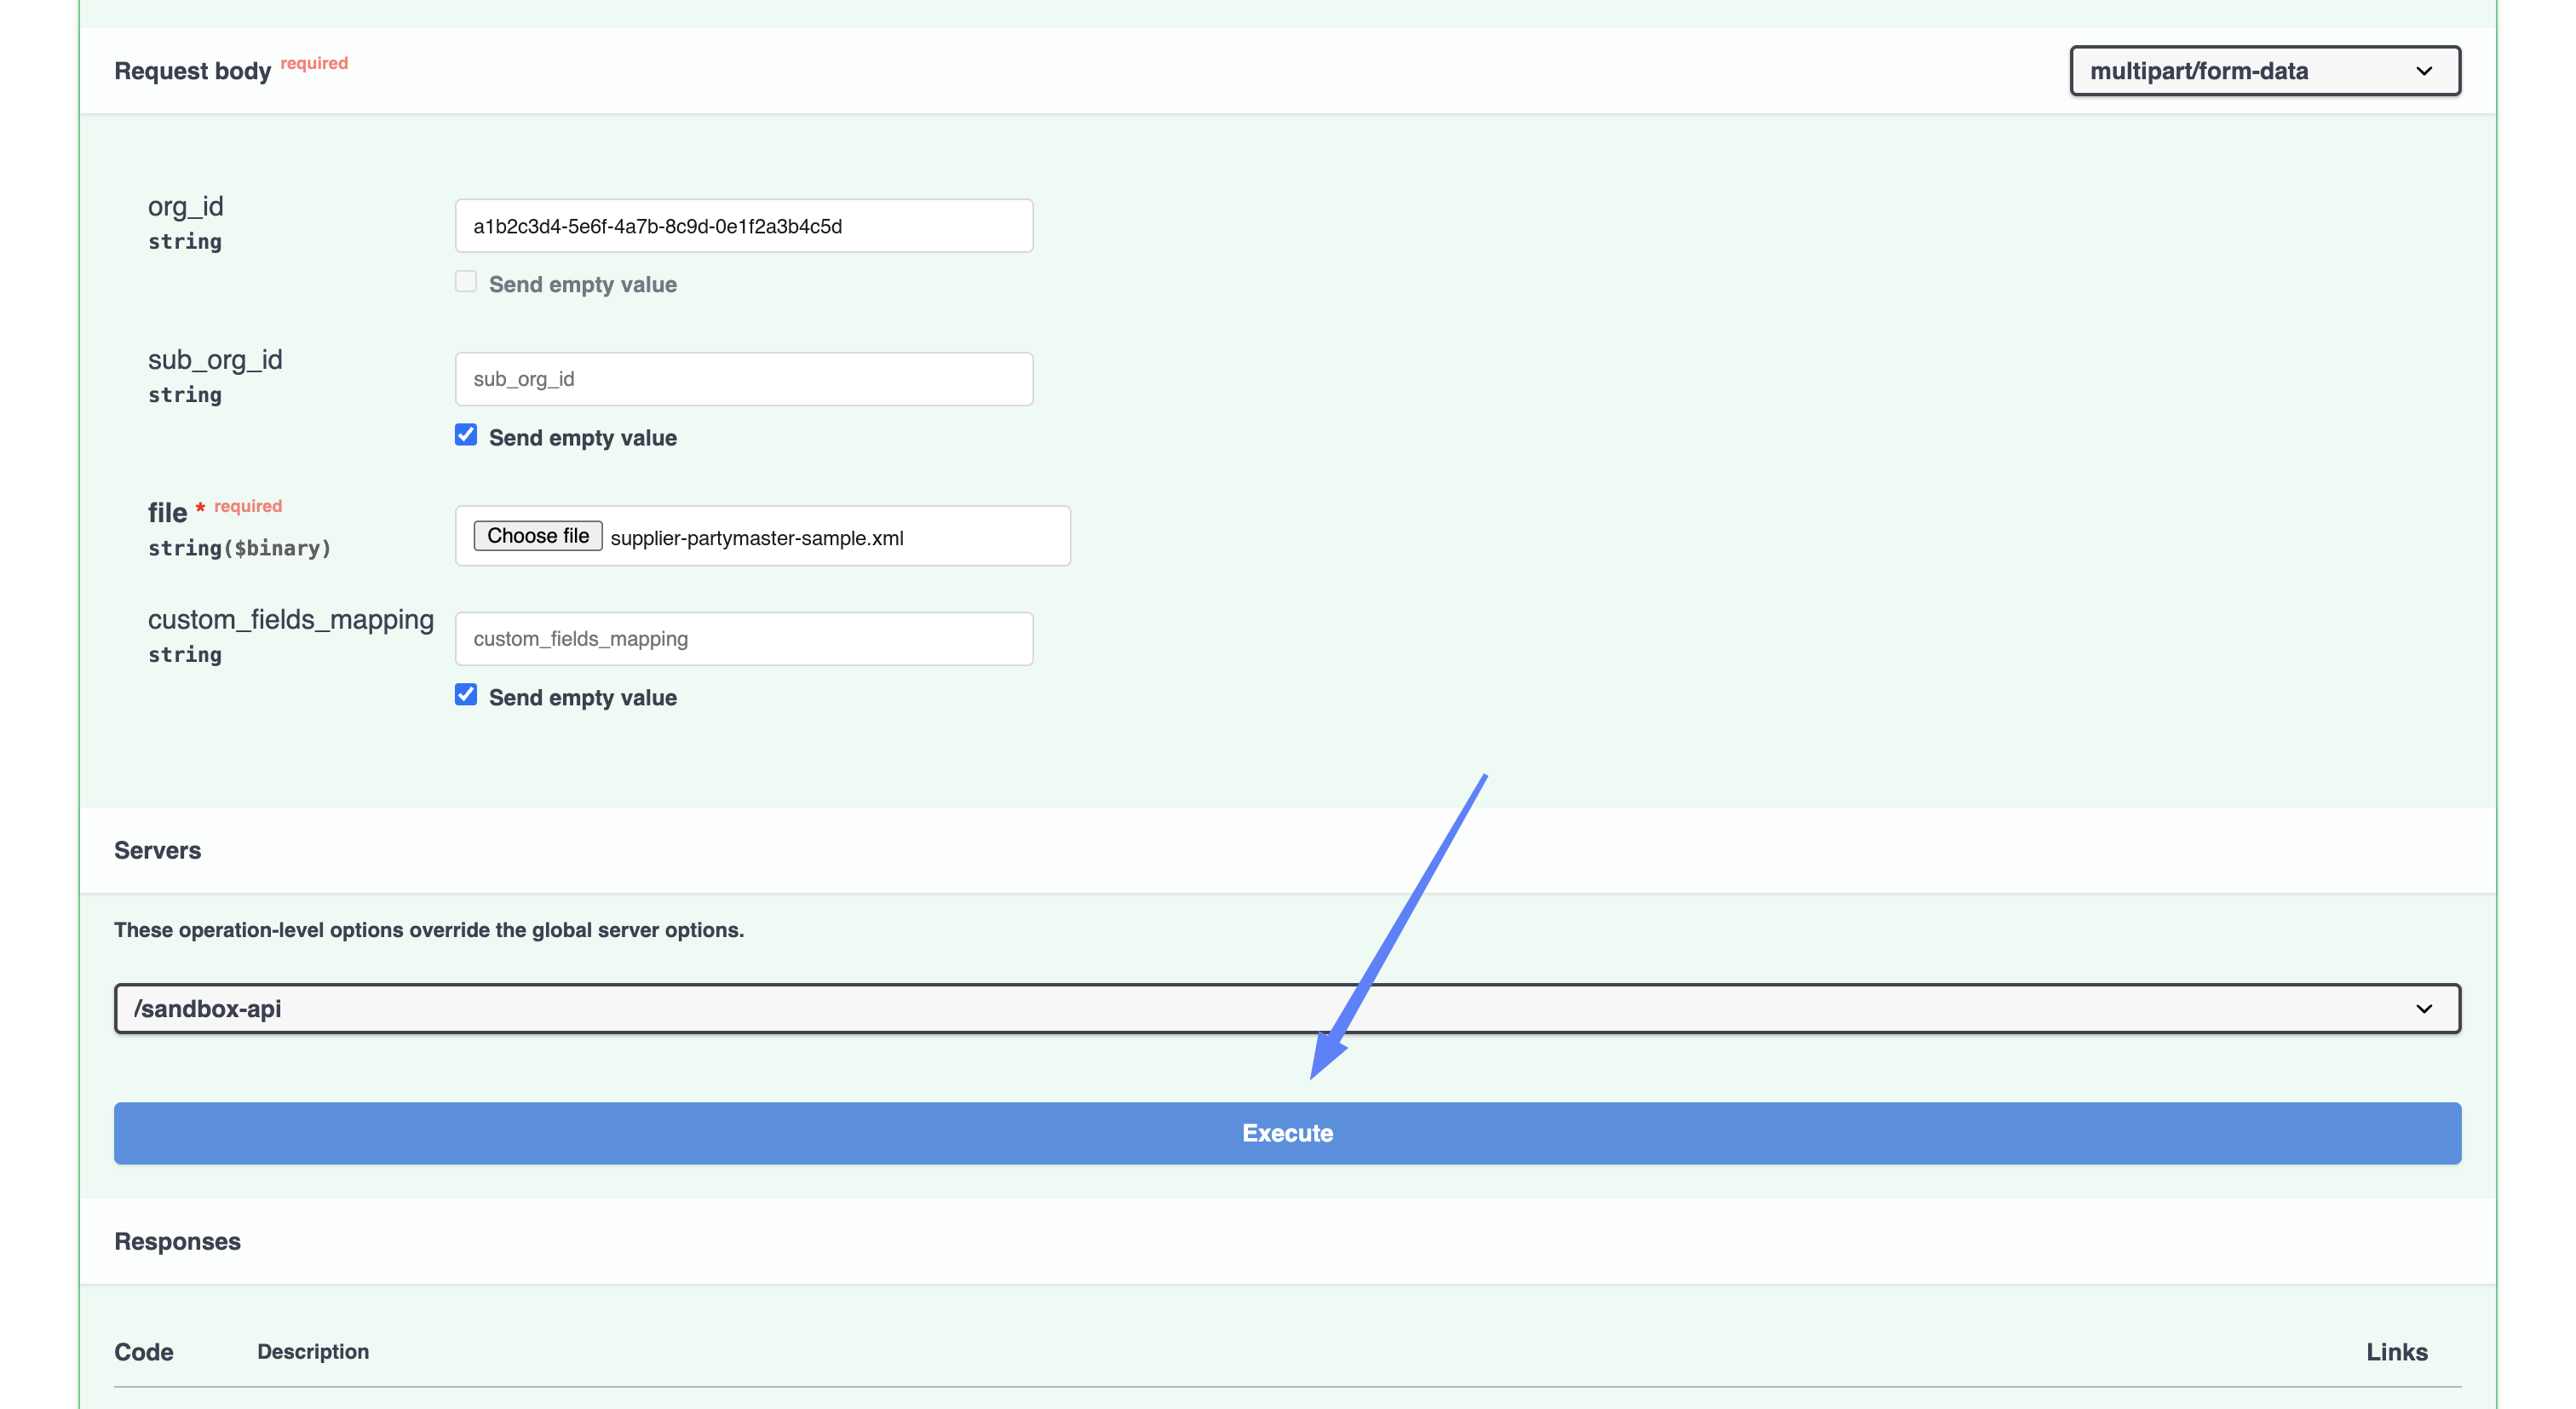
执行之前，请检查表单底部的 **Servers** 下拉菜单。它决定请求实际发送到哪个环境，可能与您打开的页面所对应的环境不同。

<figure><img src="https://1870485400-files.gitbook.io/~/files/v0/b/gitbook-x-prod.appspot.com/o/spaces%2FlPczlNw8zzYNLfjfispX%2Fuploads%2Fgit-blob-4cc88117f08888f50356c9b15b88dbed3af82562%2Fimport-execute.png?alt=media" alt="Servers 下拉菜单和 Execute 按钮"><figcaption><p>检查服务器，然后点击 Execute</p></figcaption></figure>

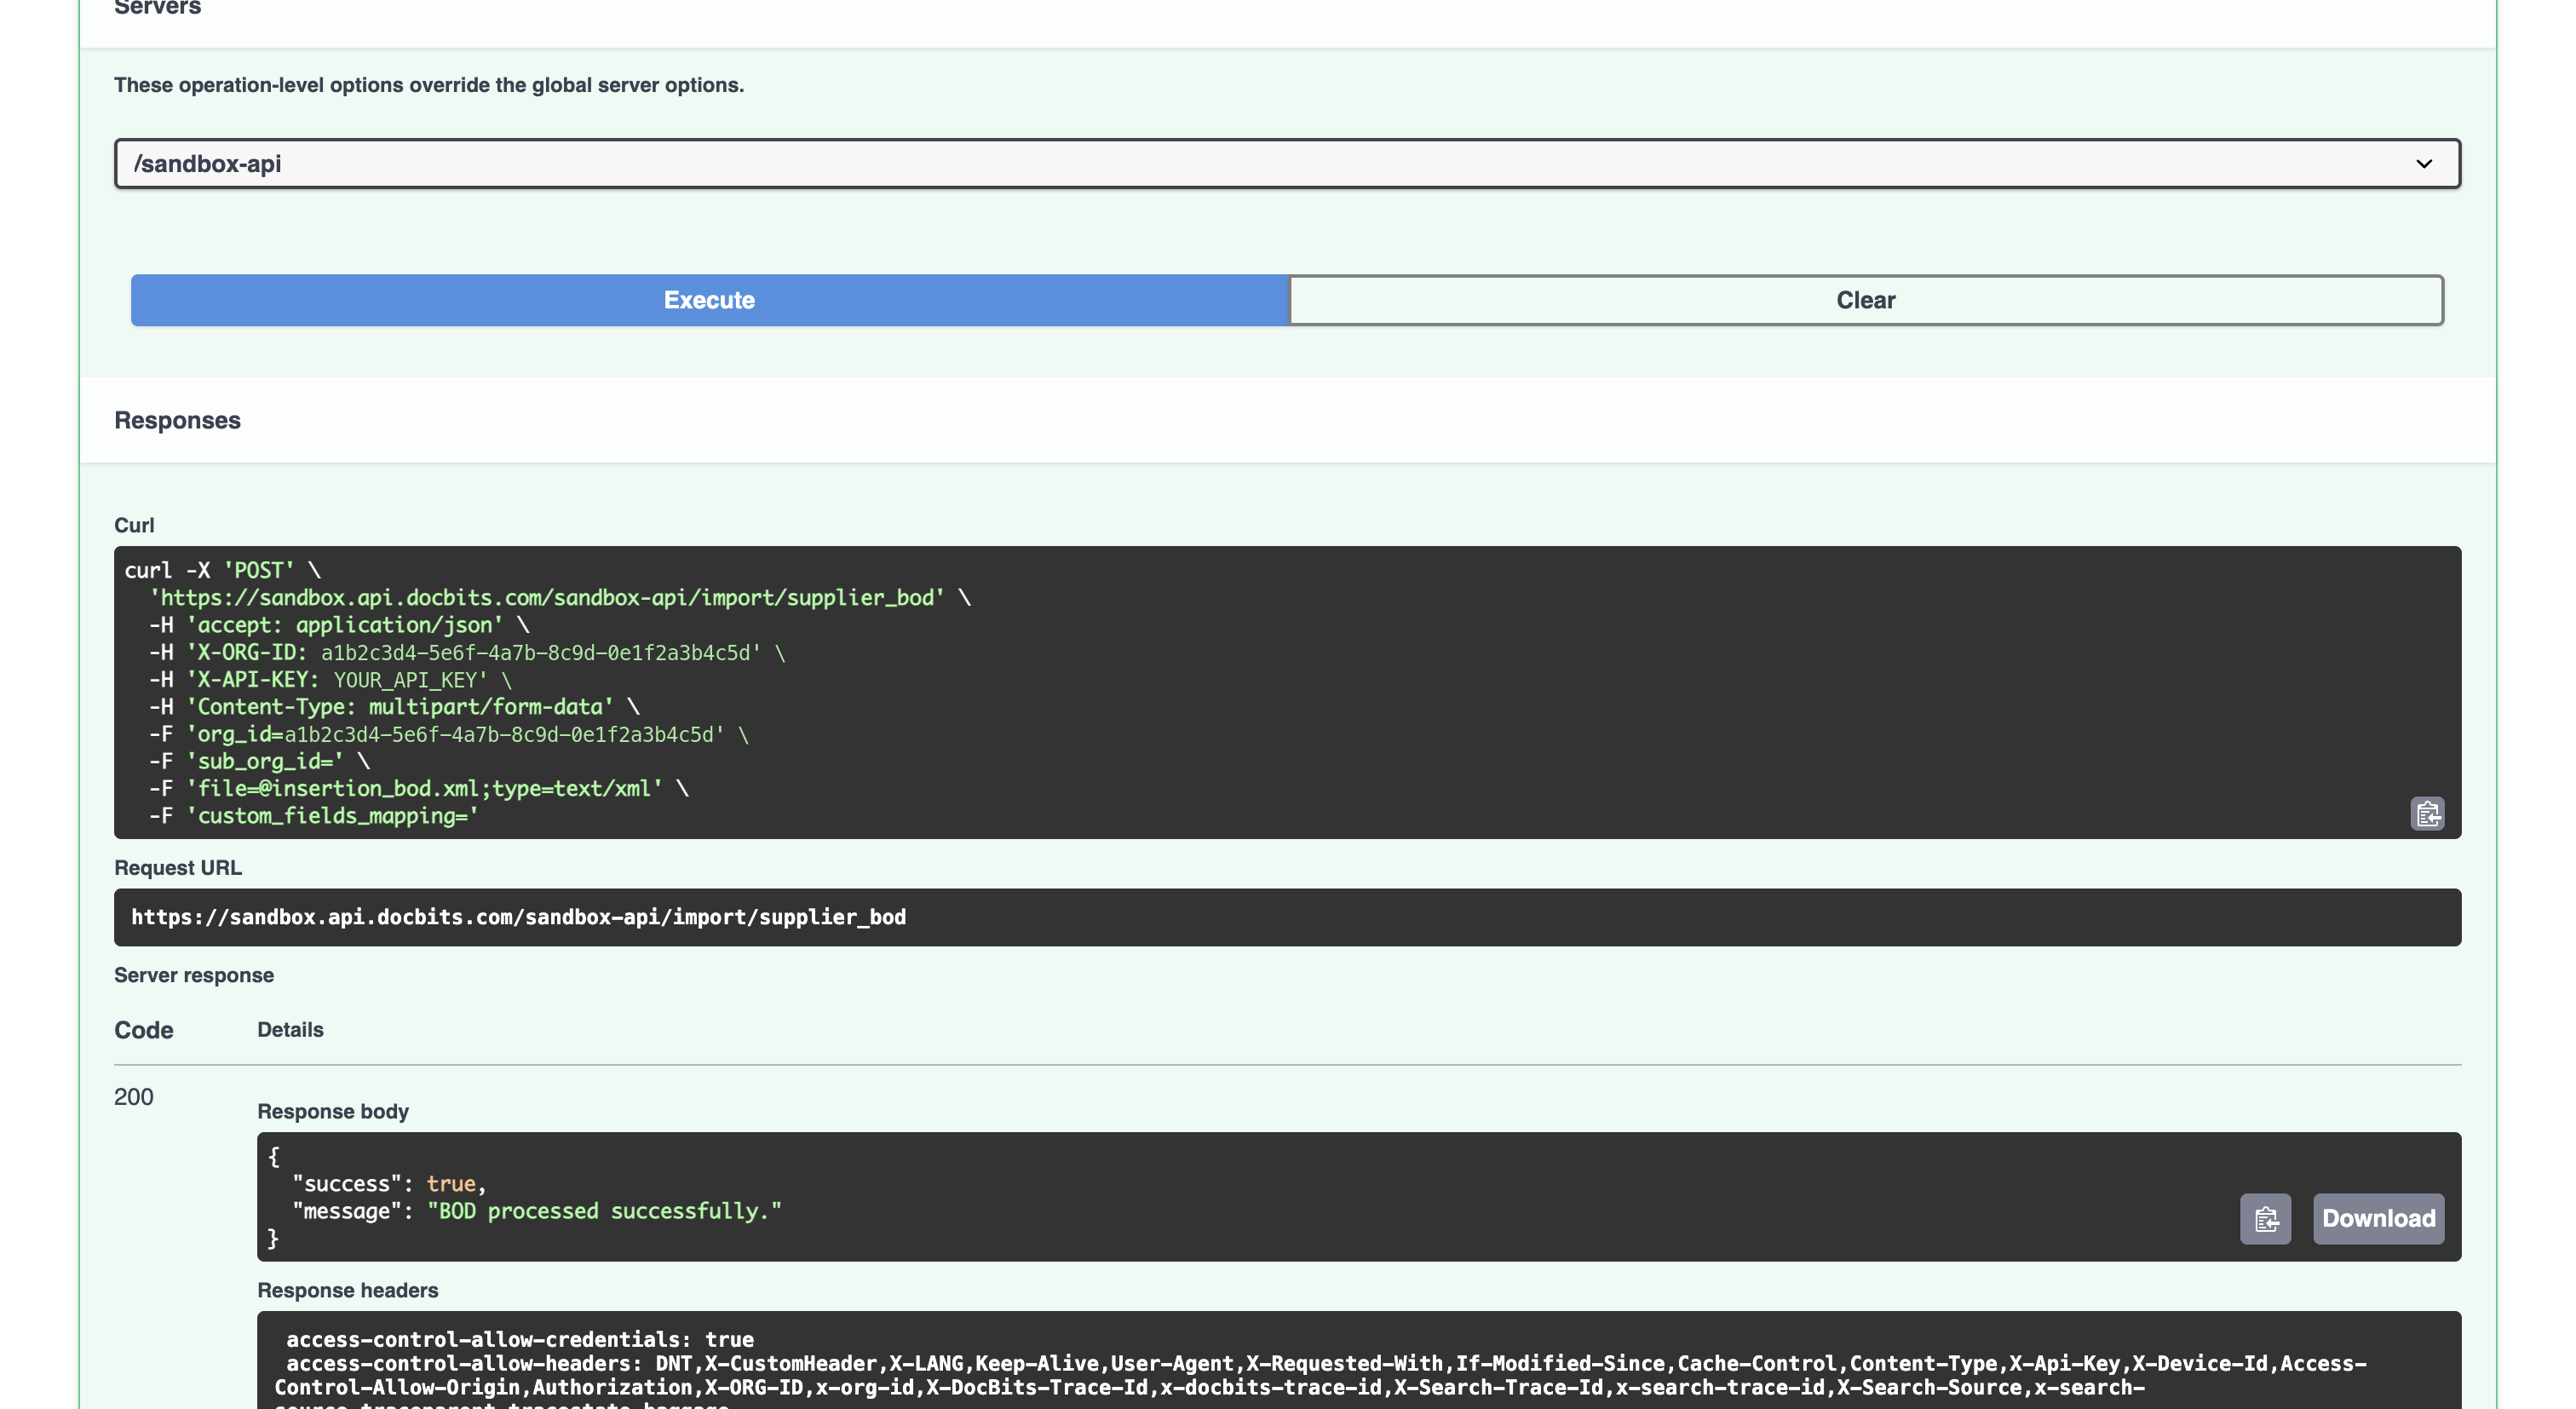
点击 **Execute**。导入成功后会返回：

```json
{
  "success": true,
  "message": "BOD processed successfully."
}
```

<figure><img src="https://1870485400-files.gitbook.io/~/files/v0/b/gitbook-x-prod.appspot.com/o/spaces%2FlPczlNw8zzYNLfjfispX%2Fuploads%2Fgit-blob-eb51f4ad42cdc2a58c55b0d658543a345fec4806%2Fimport-supplier-response.png?alt=media" alt="curl 命令和服务器响应"><figcaption><p>成功导入供应商</p></figcaption></figure>

Supplier BOD 会在您等待期间完成处理，因此看到此消息时，数据已经导入。

如果请求有误，响应会包含 `"success": false`，并附上一条说明问题的消息。最常见的原因包括：内容不是供应商 BOD，或者您的 API 密钥无权访问该 Org ID。

### 5. 检查数据是否已导入

* 在 DocBits 中，前往 **设置 → 文档处理 → 查找主数据**。
* 在左侧选择 **BOD Input Data**，然后打开 **Supplier** 选项卡。
* 搜索 BOD 中的供应商。

{% hint style="info" %}
DocBits 会根据 BOD 内部的类型来决定如何处理，而不是根据您使用的导入端点来判断。如果您误将采购订单 BOD 发送到此处，它会作为采购订单导入，而不会被拒绝。因此，请确认数据出现在预期的选项卡中。
{% endhint %}


---

# Agent Instructions
This documentation is published with GitBook. GitBook is the documentation platform designed so that both humans and AI agents can read, navigate, and reason over technical content effectively. Learn more at gitbook.com.

## Querying This Documentation
If you need additional information that is not directly available in this page, you can query the documentation by asking a question.

Perform an HTTP GET request on the following URL with the `ask` and `goal` query parameters:

```
GET https://docs.docbits.com/chinese/infor-ji-cheng-yu-pei-zhi/importing-customer-master-data/importing-via-the-api/supplier-bod.md?ask=<question>&goal=<user_goal>
```

`ask` is the immediate question: it should be specific, self-contained, and written in natural language.
`goal` is what the user is ultimately trying to achieve, the reason they need the answer. Sharing it helps GitBook give you a better, more relevant answer. A goal is most helpful when it describes the outcome the user wants rather than restating the question. For example, with `ask=how do I create an API token`, a goal like `automate deployments from our CI pipeline` lets GitBook tailor the answer to that use case.

The response will contain a direct answer to the question and relevant excerpts and sources from the documentation.

Use this mechanism when the answer is not explicitly present in the current page, you need clarification or additional context, or you want to retrieve related documentation sections.