> For the complete documentation index, see [llms.txt](https://docs.docbits.com/llms.txt). Markdown versions of documentation pages are available by appending `.md` to page URLs; this page is available as [Markdown](https://docs.docbits.com/chinese/guan-li-yu-she-zhi/settings/document-processing/import/o365-tenant.md).

# O365 租户

## 在 Azure AD 中注册应用

<mark style="color:red;">**注意**</mark>：这些权限可能需要管理员授权。

1. 使用您的凭据登录 [Azure 门户](https://portal.azure.com/)。
2. 在 Azure 服务中找到并打开 Azure Active Directory（也称为 Azure AD）。

<figure><img src="https://1870485400-files.gitbook.io/~/files/v0/b/gitbook-x-prod.appspot.com/o/spaces%2FlPczlNw8zzYNLfjfispX%2Fuploads%2Fgit-blob-c398488d35cbdef60f3051ae7f3688d430fa2037%2Fo365_tenant_1.png?alt=media" alt=""><figcaption></figcaption></figure>

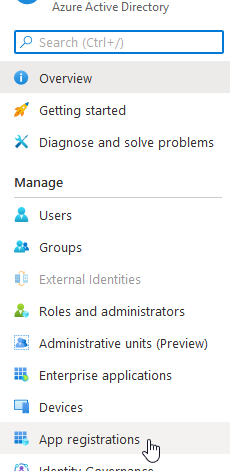
3. 在 **Manage** 部分中，选择 **App registrations**。

<figure><img src="https://1870485400-files.gitbook.io/~/files/v0/b/gitbook-x-prod.appspot.com/o/spaces%2FlPczlNw8zzYNLfjfispX%2Fuploads%2Fgit-blob-62fc6fe9093a3ac910f2ad4acac2ab60ff57a546%2Fo365_tenant_2.png?alt=media" alt=""><figcaption></figcaption></figure>

4. 在 App registrations 页面中，点击 **+ New registration**。

<figure><img src="https://1870485400-files.gitbook.io/~/files/v0/b/gitbook-x-prod.appspot.com/o/spaces%2FlPczlNw8zzYNLfjfispX%2Fuploads%2Fgit-blob-ec12b0924b4df12cbfe1507b7094e53ea6d3ba32%2Fo365_tenant_3.png?alt=media" alt=""><figcaption></figcaption></figure>

5. 此时会显示 **Register an application** 页面。在 **Name** 中输入应用面向用户显示的名称。

<figure><img src="https://1870485400-files.gitbook.io/~/files/v0/b/gitbook-x-prod.appspot.com/o/spaces%2FlPczlNw8zzYNLfjfispX%2Fuploads%2Fgit-blob-42951b5669c43b1f8f4ece733147ed40b8c335b0%2Fo365_tenant_4.png?alt=media" alt=""><figcaption></figcaption></figure>

6. 根据需要选择以下帐户类型之一：

* **Accounts in any organizational directory (Any Azure AD directory Multitenant) and personal Microsoft accounts (e.g. Skype, Xbox)**（任何组织目录中的账户〔任何 Azure AD 目录，多租户〕及个人 Microsoft 账户，例如 Skype、Xbox）
* **Accounts in any organizational directory (Any Azure AD directory Multitenant)**

<figure><img src="https://1870485400-files.gitbook.io/~/files/v0/b/gitbook-x-prod.appspot.com/o/spaces%2FlPczlNw8zzYNLfjfispX%2Fuploads%2Fgit-blob-5e3d69519a0233b8d0e1a3024aeed4499cc85060%2Fo365_tenant_5.png?alt=media" alt=""><figcaption></figcaption></figure>

7. 保持 **Redirect URI (optional)** 选项不变。

<figure><img src="https://1870485400-files.gitbook.io/~/files/v0/b/gitbook-x-prod.appspot.com/o/spaces%2FlPczlNw8zzYNLfjfispX%2Fuploads%2Fgit-blob-8123073090998509aef1f47c338ff8c5238834b6%2Fo365_tenant_6.png?alt=media" alt=""><figcaption></figcaption></figure>

8. 点击 **Register** 完成应用注册。随后会返回新应用的页面。
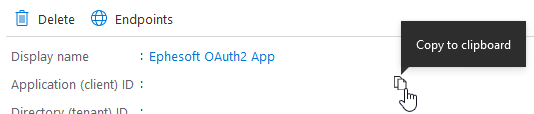
9. 在应用页面中找到 **Application (client) ID**。复制此 ID，以便在为 **DocBits** 配置电子邮件导入时使用。

<figure><img src="https://1870485400-files.gitbook.io/~/files/v0/b/gitbook-x-prod.appspot.com/o/spaces%2FlPczlNw8zzYNLfjfispX%2Fuploads%2Fgit-blob-0b0c1a81dbba5e7e15545b681176e2b158c81196%2Fo365_tenant_7.png?alt=media" alt=""><figcaption></figcaption></figure>

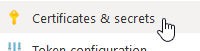
10. 在左侧面板中选择 **Certificates & secrets**：

<figure><img src="https://1870485400-files.gitbook.io/~/files/v0/b/gitbook-x-prod.appspot.com/o/spaces%2FlPczlNw8zzYNLfjfispX%2Fuploads%2Fgit-blob-9c41793f2514aa0d2de2bfb455008506e99ca527%2Fo365_tenant_8.png?alt=media" alt=""><figcaption></figcaption></figure>

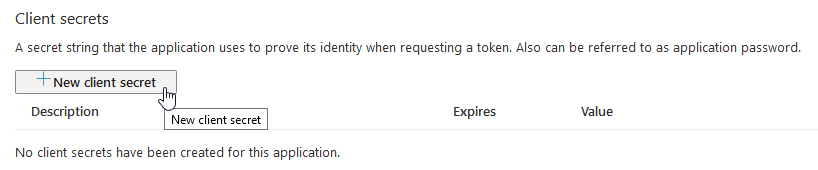
11. 在 **Certificates & secrets** 页面中，点击 **Client secrets** 部分下的 **+ New client secret** 按钮：

<figure><img src="https://1870485400-files.gitbook.io/~/files/v0/b/gitbook-x-prod.appspot.com/o/spaces%2FlPczlNw8zzYNLfjfispX%2Fuploads%2Fgit-blob-bd0cd9197596f1b367c75d8308ed1dde9deabab3%2Fo365_tenant_9.png?alt=media" alt=""><figcaption></figcaption></figure>

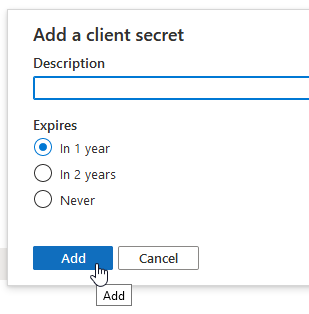
12. 在 **Add a client secret** 对话框中，点击 **Add** 按钮：

<figure><img src="https://1870485400-files.gitbook.io/~/files/v0/b/gitbook-x-prod.appspot.com/o/spaces%2FlPczlNw8zzYNLfjfispX%2Fuploads%2Fgit-blob-a77c7eddbbc5788d30df70b59040543ad5c80832%2Fo365_tenant_10.png?alt=media" alt=""><figcaption></figcaption></figure>

建议填写描述，以便在多个密钥中识别此密钥（目前每个应用最多可创建 2 个密钥）。

<figure><img src="https://1870485400-files.gitbook.io/~/files/v0/b/gitbook-x-prod.appspot.com/o/spaces%2FlPczlNw8zzYNLfjfispX%2Fuploads%2Fgit-blob-9100c1ecaa637b30584d99624f88bf6d6a8baf4a%2Fo365_tenant_11.png?alt=media" alt=""><figcaption></figcaption></figure>

<mark style="color:red;">**注意**</mark>：请根据公司的策略选择过期日期。密钥过期后，需要创建新的客户端密钥，并在之前使用该密钥的每项电子邮件配置中指定新密钥。

13. 新生成的客户端密钥将会显示。复制此客户端密钥，以便在配置 DocBits 电子邮件导入时使用。

<figure><img src="https://1870485400-files.gitbook.io/~/files/v0/b/gitbook-x-prod.appspot.com/o/spaces%2FlPczlNw8zzYNLfjfispX%2Fuploads%2Fgit-blob-efa505fb265c4d945a5636ba6b26468cb71639ae%2Fo365_tenant_12.png?alt=media" alt=""><figcaption></figcaption></figure>

\*\*重要提示：\*\*请确保已复制客户端密钥。关闭后将无法再次查看该密钥。

14. 在左侧面板中选择 **Authentication**。右侧将显示 **Authentication** 页面。

<figure><img src="https://1870485400-files.gitbook.io/~/files/v0/b/gitbook-x-prod.appspot.com/o/spaces%2FlPczlNw8zzYNLfjfispX%2Fuploads%2Fgit-blob-42c3f891e51efbefc2eae929be7d4d1304b7945b%2Fo365_tenant_13.png?alt=media" alt=""><figcaption></figcaption></figure>

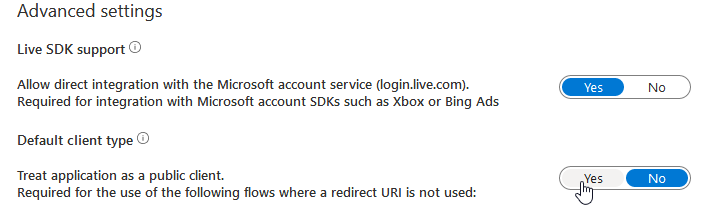
15. 在 **Advanced settings** 部分中，将 **Default client type** 设置为 **Yes**。

<figure><img src="https://1870485400-files.gitbook.io/~/files/v0/b/gitbook-x-prod.appspot.com/o/spaces%2FlPczlNw8zzYNLfjfispX%2Fuploads%2Fgit-blob-2a0175dfeee8ab9fb35097294956ed076ef72724%2Fo365_tenant_14.png?alt=media" alt=""><figcaption></figcaption></figure>

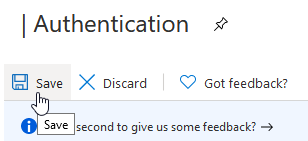
16. 点击 **Save** 以确认更改。

<figure><img src="https://1870485400-files.gitbook.io/~/files/v0/b/gitbook-x-prod.appspot.com/o/spaces%2FlPczlNw8zzYNLfjfispX%2Fuploads%2Fgit-blob-54fb6b7acfae432d326f74b009f20e34c073a105%2Fo365_tenant_15.png?alt=media" alt=""><figcaption></figcaption></figure>

17. 在左侧面板中选择 **API permissions**。随后会显示 API permissions 页面。

<figure><img src="https://1870485400-files.gitbook.io/~/files/v0/b/gitbook-x-prod.appspot.com/o/spaces%2FlPczlNw8zzYNLfjfispX%2Fuploads%2Fgit-blob-c3246c9a939c695cbbf7287818a4fa450eff444d%2Fo365_tenant_16.png?alt=media" alt=""><figcaption></figcaption></figure>

18. 默认情况下，**Microsoft Graph** 的 **User.Read** 权限已存在，请保持不变。

<figure><img src="https://1870485400-files.gitbook.io/~/files/v0/b/gitbook-x-prod.appspot.com/o/spaces%2FlPczlNw8zzYNLfjfispX%2Fuploads%2Fgit-blob-5ac2644283a678096986a2aaabbabd7d6967aa4d%2Fo365_tenant_17.png?alt=media" alt=""><figcaption></figcaption></figure>

<mark style="color:red;">**注意**</mark>：此权限为必需权限。如果没有此权限，请按照下方添加 **Mail.ReadWrite** 权限的步骤添加该权限。

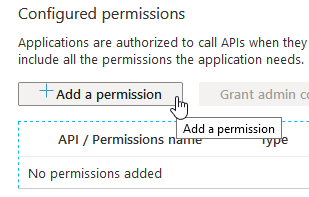
19. 点击 **+ Add a permission**。这将打开 **Request API permissions** 面板。

<figure><img src="https://1870485400-files.gitbook.io/~/files/v0/b/gitbook-x-prod.appspot.com/o/spaces%2FlPczlNw8zzYNLfjfispX%2Fuploads%2Fgit-blob-096d4f405199e109fca5e6ac982b2311b0b6d5e0%2Fo365_tenant_18.png?alt=media" alt=""><figcaption></figcaption></figure>

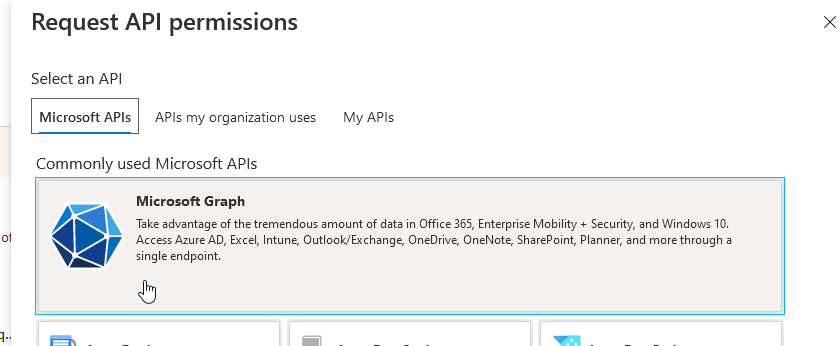
20. 点击 **Microsoft Graph**。

<figure><img src="https://1870485400-files.gitbook.io/~/files/v0/b/gitbook-x-prod.appspot.com/o/spaces%2FlPczlNw8zzYNLfjfispX%2Fuploads%2Fgit-blob-7fbb76f95b14d7e0e6314c49197dbb7061a98f5e%2Fo365_tenant_19.png?alt=media" alt=""><figcaption></figcaption></figure>

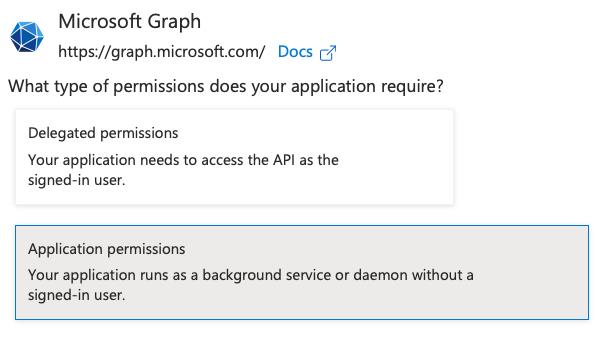
21. 从两个子类别中选择 **App Permissions**。

<figure><img src="https://1870485400-files.gitbook.io/~/files/v0/b/gitbook-x-prod.appspot.com/o/spaces%2FlPczlNw8zzYNLfjfispX%2Fuploads%2Fgit-blob-9f986095f9f6a0da22cebdc56899541debcf0a92%2Fo365_tenant_20.png?alt=media" alt=""><figcaption></figcaption></figure>

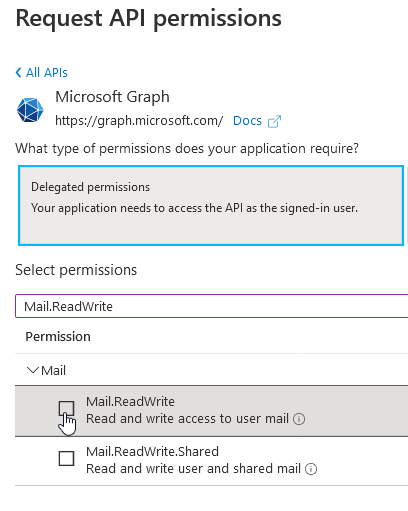
22. 在搜索框中输入 **Mail.ReadWrite**。勾选该权限对应的 **Mail.ReadWrite** 复选框。

<figure><img src="https://1870485400-files.gitbook.io/~/files/v0/b/gitbook-x-prod.appspot.com/o/spaces%2FlPczlNw8zzYNLfjfispX%2Fuploads%2Fgit-blob-e8dadde22429ee0c87b3d999f23310866d0f9f78%2Fo365_tenant_21.png?alt=media" alt=""><figcaption></figcaption></figure>

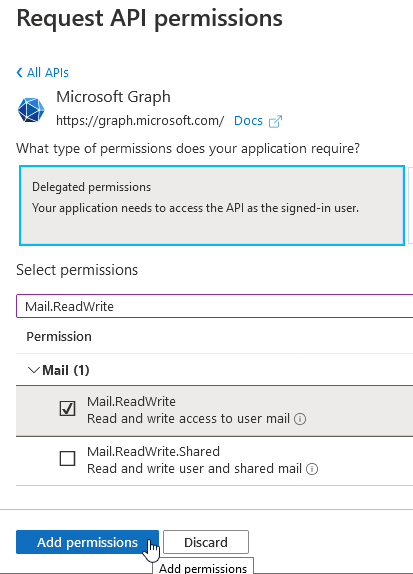
23. 面板底部将启用 **Add permissions** 按钮。点击 **Add permissions**。

<figure><img src="https://1870485400-files.gitbook.io/~/files/v0/b/gitbook-x-prod.appspot.com/o/spaces%2FlPczlNw8zzYNLfjfispX%2Fuploads%2Fgit-blob-13108c48235f8fdf19756539a58cef3573c0c73e%2Fo365_tenant_22.png?alt=media" alt=""><figcaption></figcaption></figure>

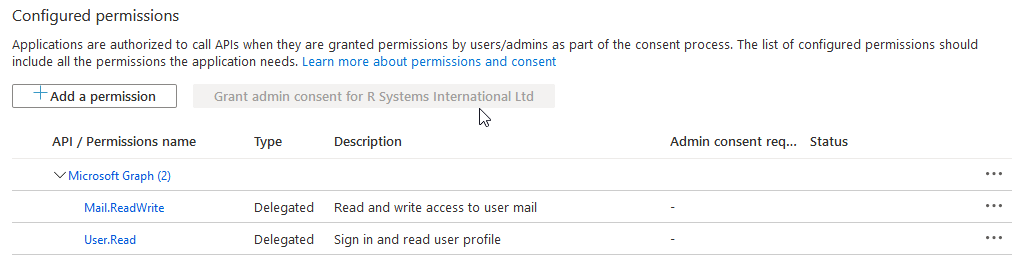
24. 这会将 **Mail.ReadWrite** 权限添加到应用的 **Configured permissions** 列表中。

<mark style="color:red;">**注意**</mark>：可能需要管理员权限。管理员必须授权应用使用这些权限。授权后，授予状态将如下所示：

<figure><img src="https://1870485400-files.gitbook.io/~/files/v0/b/gitbook-x-prod.appspot.com/o/spaces%2FlPczlNw8zzYNLfjfispX%2Fuploads%2Fgit-blob-3f558e606a531813a2e42b2460b5cc2642f98926%2Fo365_tenant_23.png?alt=media" alt=""><figcaption></figcaption></figure>


---

# Agent Instructions
This documentation is published with GitBook. GitBook is the documentation platform designed so that both humans and AI agents can read, navigate, and reason over technical content effectively. Learn more at gitbook.com.

## Querying This Documentation
If you need additional information that is not directly available in this page, you can query the documentation by asking a question.

Perform an HTTP GET request on the following URL with the `ask` and `goal` query parameters:

```
GET https://docs.docbits.com/chinese/guan-li-yu-she-zhi/settings/document-processing/import/o365-tenant.md?ask=<question>&goal=<user_goal>
```

`ask` is the immediate question: it should be specific, self-contained, and written in natural language.
`goal` is what the user is ultimately trying to achieve, the reason they need the answer. Sharing it helps GitBook give you a better, more relevant answer. A goal is most helpful when it describes the outcome the user wants rather than restating the question. For example, with `ask=how do I create an API token`, a goal like `automate deployments from our CI pipeline` lets GitBook tailor the answer to that use case.

The response will contain a direct answer to the question and relevant excerpts and sources from the documentation.

Use this mechanism when the answer is not explicitly present in the current page, you need clarification or additional context, or you want to retrieve related documentation sections.