> For the complete documentation index, see [llms.txt](https://docs.docbits.com/llms.txt). Markdown versions of documentation pages are available by appending `.md` to page URLs; this page is available as [Markdown](https://docs.docbits.com/chinese/gai-shu-yu-ji-chu/two-factor-authentication.md).

# 双重身份验证（2FA）

## 概述

双重身份验证（2FA）会在登录时增加第二个步骤。输入密码后，DocBits 会要求你提供只有你拥有的第二种验证方式：身份验证器应用中的验证码、发送到你邮箱的验证码，或通行密钥（Touch ID、Windows Hello、YubiKey、1Password）。即使有人得知了你的密码，没有第二种验证方式也无法登录。

2FA 对**每位用户均为可选**，也可以由**组织管理员设为必需**。单点登录（SSO）登录方式（Google、Microsoft、SAML）不受此要求限制，因为你的身份提供方已实施自己的 MFA。

你可以注册多种验证方式。DocBits 支持以下方式：

* **身份验证器应用（TOTP）** — Google Authenticator、Microsoft Authenticator、1Password、Authy 等。
* **邮箱验证码** — 发送到你账户邮箱的 6 位验证码。
* **通行密钥（WebAuthn/FIDO2）** — Touch ID、Windows Hello、硬件密钥（YubiKey）或密码管理器。

启用第一种验证方式时，DocBits 还会提供**十个备用码**，以便你在无法使用验证方式时登录。

## 查找位置

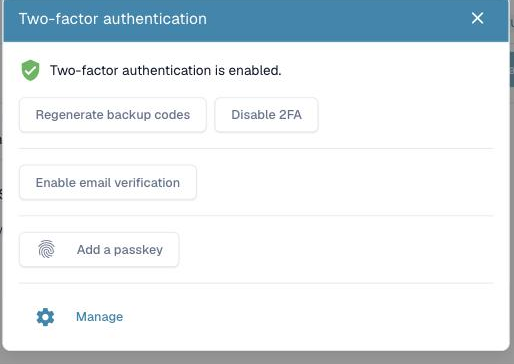
打开你的**个人资料 / 账户设置**（右上角账户菜单 → **编辑个人资料**），然后选择**双重身份验证**。2FA 对话框会显示当前状态以及可添加的验证方式。

<figure><img src="https://1870485400-files.gitbook.io/~/files/v0/b/gitbook-x-prod.appspot.com/o/spaces%2FlPczlNw8zzYNLfjfispX%2Fuploads%2Fgit-blob-cb309224b86e2bf441e0cb5a36e65e153e953a68%2Fmfa-2fa-dialog.png?alt=media" alt="双重身份验证对话框"><figcaption><p>双重身份验证对话框。在此处可以启用身份验证器应用、邮箱验证、添加通行密钥，或打开<strong>管理</strong>。</p></figcaption></figure>

## 设置身份验证器应用（TOTP）

1. 在 2FA 对话框中，点击**启用 2FA**。
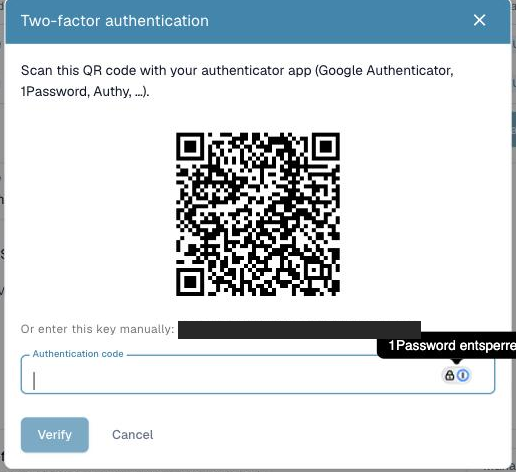
2. 使用身份验证器应用扫描二维码（Google Authenticator、1Password、Authy 等）。如果无法扫描，请使用二维码下方显示的**手动密钥**。
3. 输入应用显示的 6 位验证码并确认。
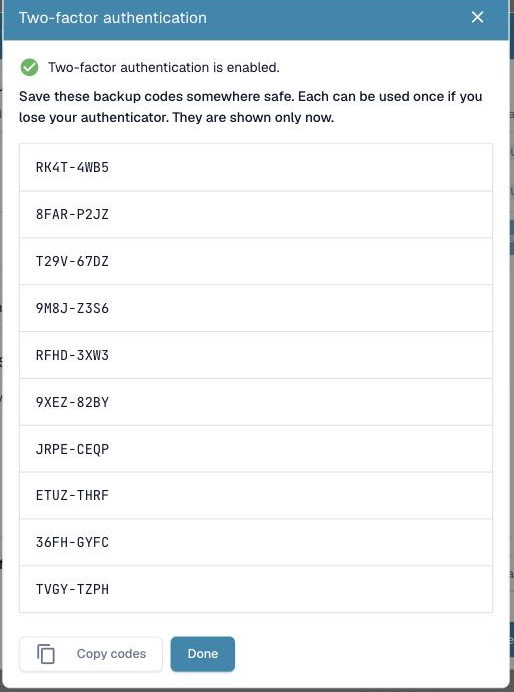
4. DocBits 会启用 2FA 并显示你的**备用码**（见下文）。

<figure><img src="https://1870485400-files.gitbook.io/~/files/v0/b/gitbook-x-prod.appspot.com/o/spaces%2FlPczlNw8zzYNLfjfispX%2Fuploads%2Fgit-blob-3099913ebc3a73a099e667e68defdd86b31836c5%2Fmfa-totp-setup.png?alt=media" alt="显示二维码的身份验证器应用设置页面"><figcaption><p>使用身份验证器应用扫描二维码，或输入手动密钥。然后输入应用显示的 6 位验证码进行确认。</p></figcaption></figure>

## 设置邮箱验证

1. 在 2FA 对话框中，点击**启用邮箱验证**。
2. DocBits 会向你的账户邮箱发送一封包含 6 位验证码的邮件。
3. 输入验证码进行确认。邮箱验证现已启用。

## 添加通行密钥

1. 在 2FA 对话框中，点击**添加通行密钥**。
2. 浏览器或设备会提示你使用 Touch ID、Windows Hello、硬件密钥或密码管理器进行确认。
3. 通行密钥已保存。你可以添加多个通行密钥，之后也可以为它们重命名或将其移除。

## 备用码

启用**第一种**验证方式时，DocBits 会**仅显示一次\*\*\*\*十个备用码**。每个备用码只能使用一次；如果无法使用身份验证器或手机，你可以用备用码登录。

* 将备用码保存在安全的地方（密码管理器是理想选择）。
* 你可以随时使用**重新生成备用码**创建一组新码（旧码将失效）。

<figure><img src="https://1870485400-files.gitbook.io/~/files/v0/b/gitbook-x-prod.appspot.com/o/spaces%2FlPczlNw8zzYNLfjfispX%2Fuploads%2Fgit-blob-dd8b851701c0d1f78d1f34822d5ece134d7fe31a%2Fmfa-backup-codes.png?alt=media" alt="备用码页面"><figcaption><p>你的十个备用码，仅显示一次。每个码只能使用一次，请将它们保存在安全的地方。</p></figcaption></figure>

{% hint style="warning" %}
备用码只会在生成时显示。DocBits 无法再次显示这些备用码，请立即保存。
{% endhint %}

## 使用 2FA 登录

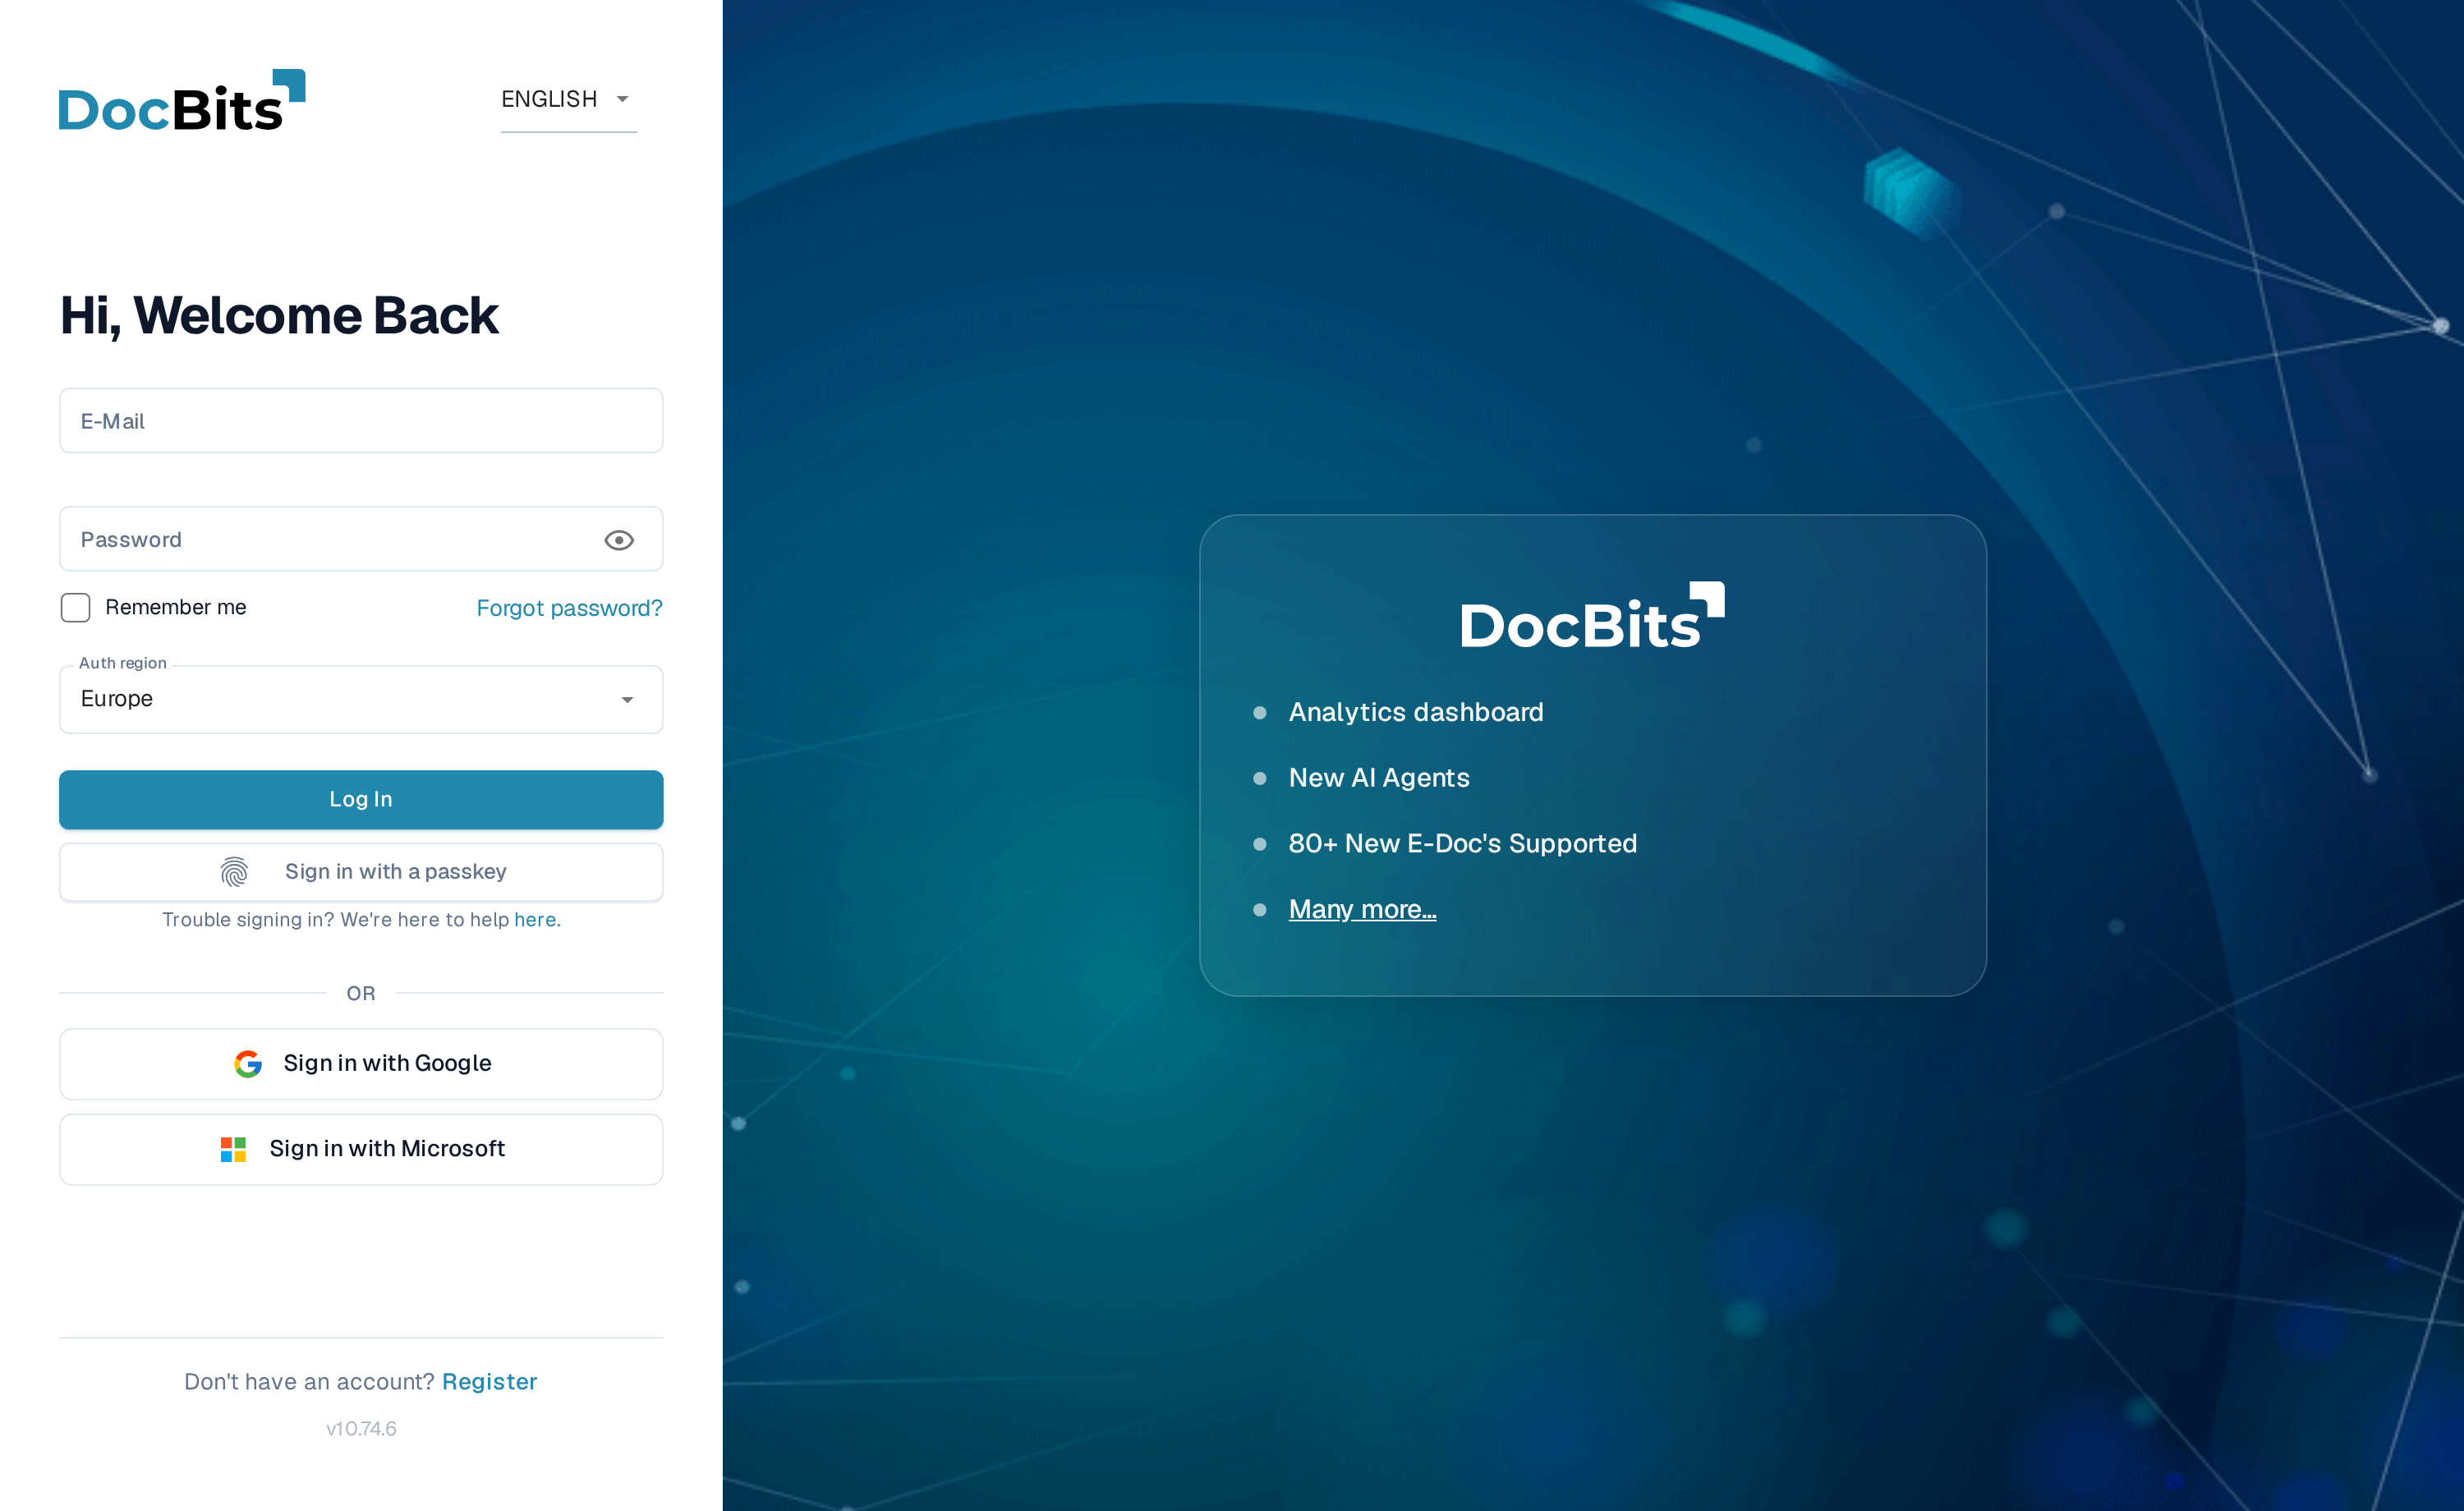
1. 像往常一样输入邮箱和密码。

   <figure><img src="https://1870485400-files.gitbook.io/~/files/v0/b/gitbook-x-prod.appspot.com/o/spaces%2FlPczlNw8zzYNLfjfispX%2Fuploads%2Fgit-blob-e868c8f3fd974855c7ed1089b0f13f26816553dc%2Fmfa-login.png?alt=media" alt="DocBits 登录页面"><figcaption><p>登录页面。你也可以点击<strong>使用通行密钥登录</strong>，无需密码即可登录。</p></figcaption></figure>
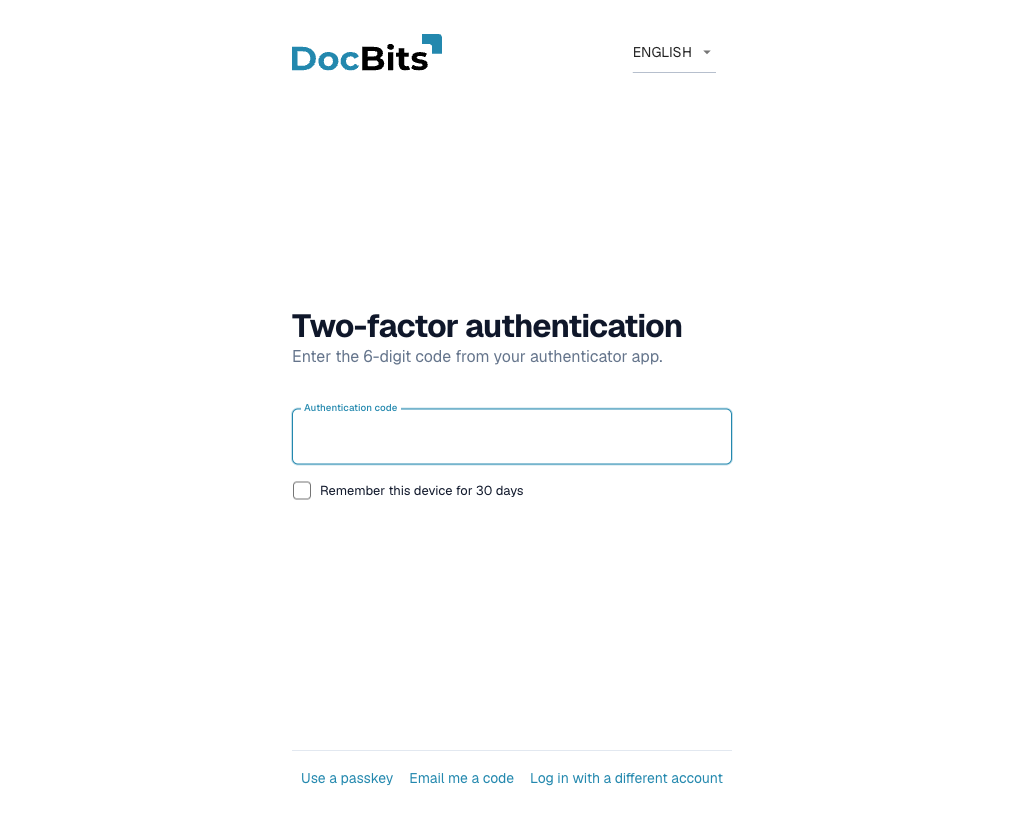
2. DocBits 会要求你提供第二种验证方式。选择一种方式：

   * **身份验证器** — 输入应用当前显示的 6 位验证码。
   * **邮箱** — 点击**通过邮件发送验证码**接收验证码，然后输入验证码。
   * **通行密钥** — 点击**使用通行密钥**，并使用 Touch ID / Windows Hello / 密钥进行确认。
   * **备用码** — 如果无法使用常用验证方式，请使用备用码。

   <figure><img src="https://1870485400-files.gitbook.io/~/files/v0/b/gitbook-x-prod.appspot.com/o/spaces%2FlPczlNw8zzYNLfjfispX%2Fuploads%2Fgit-blob-e210e2dd77e85363d7dfffbad3504faf635d9dfa%2Fmfa-challenge.png?alt=media" alt="第二步验证页面"><figcaption><p>输入密码后，DocBits 会要求你提供第二种验证方式。点击<strong>使用通行密钥</strong>或<strong>通过邮件发送验证码</strong>切换方式；你也可以选择信任此设备 30 天。</p></figcaption></figure>
3. 验证成功后，你便会登录。

### 邮箱验证码的样式

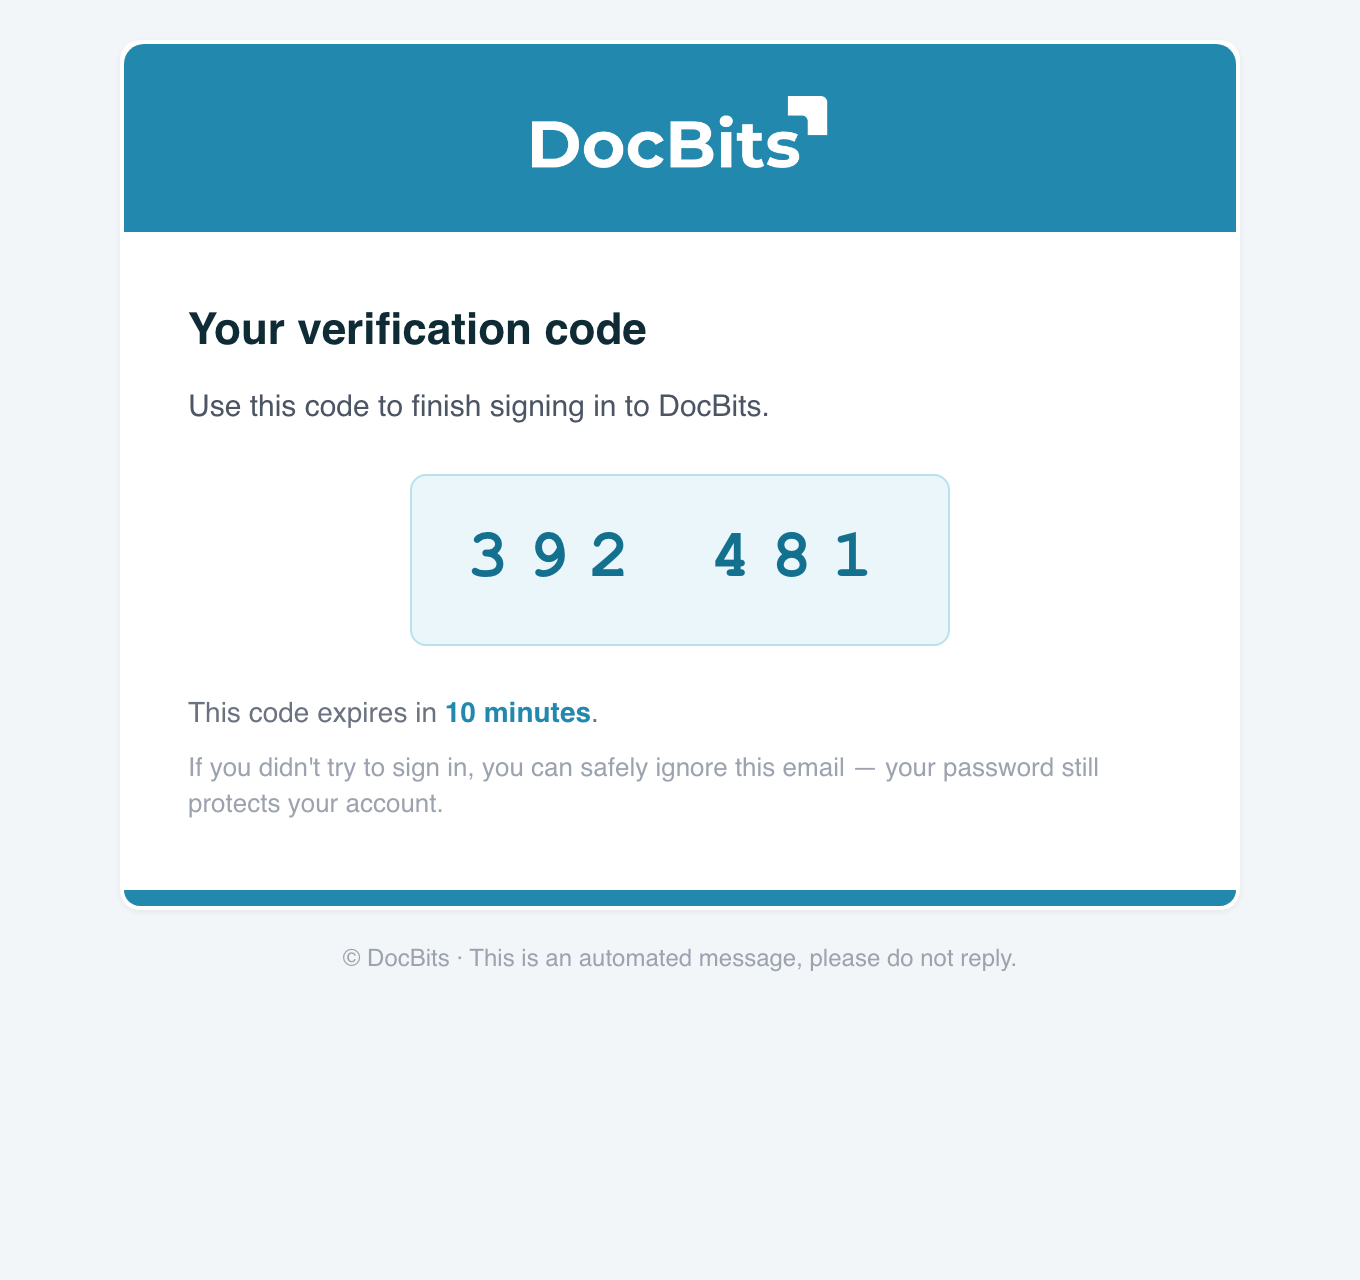
如果选择**邮箱**，DocBits 会发送一封包含 6 位验证码的邮件，该验证码会在 10 分钟后过期：

<figure><img src="https://1870485400-files.gitbook.io/~/files/v0/b/gitbook-x-prod.appspot.com/o/spaces%2FlPczlNw8zzYNLfjfispX%2Fuploads%2Fgit-blob-bc74a9e955a382dd95b72dc7254ced621d07ea12%2Fmfa-email-otp.png?alt=media" alt="DocBits 验证码邮件"><figcaption><p>验证码邮件。验证码在 10 分钟后过期，且只能使用一次。</p></figcaption></figure>

## 信任此设备

在第二步验证页面，你可以勾选**记住此设备**。此后 2FA 将在这台设备上跳过**30 天**。更改密码后，系统会自动取消对该设备的信任；你也可以随时自行撤销信任（见下文）。

## 管理通行密钥和受信任设备

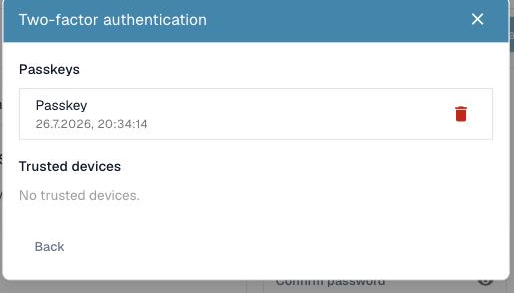
打开 2FA 对话框并点击**管理**，即可查看已注册的验证方式。

* **通行密钥** — 点击通行密钥名称即可重命名，也可以将其删除。删除最后一个剩余的验证方式会关闭 2FA。
* **受信任设备** — 撤销对单台设备的信任，或点击**撤销所有设备**，以便在所有设备上重新触发 2FA 验证。

<figure><img src="https://1870485400-files.gitbook.io/~/files/v0/b/gitbook-x-prod.appspot.com/o/spaces%2FlPczlNw8zzYNLfjfispX%2Fuploads%2Fgit-blob-ee1ecaa7910d3373036b26c8d18717363b446c45%2Fmfa-passkeys-list.png?alt=media" alt="管理已注册的通行密钥和受信任设备"><figcaption><p>管理视图会列出已注册的通行密钥和受信任设备，你可以在此重命名或移除它们。</p></figcaption></figure>

## 关闭 2FA

在 2FA 对话框中点击**禁用 2FA**，然后使用当前的身份验证器验证码或备用码进行确认。关闭 2FA 也会清除你的备用码并撤销对受信任设备的信任。

{% hint style="info" %}
如果你的组织**要求**使用 MFA，那么在设置至少一种验证方式之前，你无法使用密码登录。如果不确定组织是否强制要求 MFA，请咨询管理员。
{% endhint %}

## 无密码登录（可选）

设置通行密钥后，你可以在登录页面点击**使用通行密钥登录**，**无需输入密码**即可登录。密码仍可用作备用方式。无密码登录需要通过通行密钥验证你的身份（Touch ID / Windows Hello / PIN），因此速度更快，也能抵御网络钓鱼。


---

# Agent Instructions
This documentation is published with GitBook. GitBook is the documentation platform designed so that both humans and AI agents can read, navigate, and reason over technical content effectively. Learn more at gitbook.com.

## Querying This Documentation
If you need additional information that is not directly available in this page, you can query the documentation by asking a question.

Perform an HTTP GET request on the following URL with the `ask` and `goal` query parameters:

```
GET https://docs.docbits.com/chinese/gai-shu-yu-ji-chu/two-factor-authentication.md?ask=<question>&goal=<user_goal>
```

`ask` is the immediate question: it should be specific, self-contained, and written in natural language.
`goal` is what the user is ultimately trying to achieve, the reason they need the answer. Sharing it helps GitBook give you a better, more relevant answer. A goal is most helpful when it describes the outcome the user wants rather than restating the question. For example, with `ask=how do I create an API token`, a goal like `automate deployments from our CI pipeline` lets GitBook tailor the answer to that use case.

The response will contain a direct answer to the question and relevant excerpts and sources from the documentation.

Use this mechanism when the answer is not explicitly present in the current page, you need clarification or additional context, or you want to retrieve related documentation sections.